


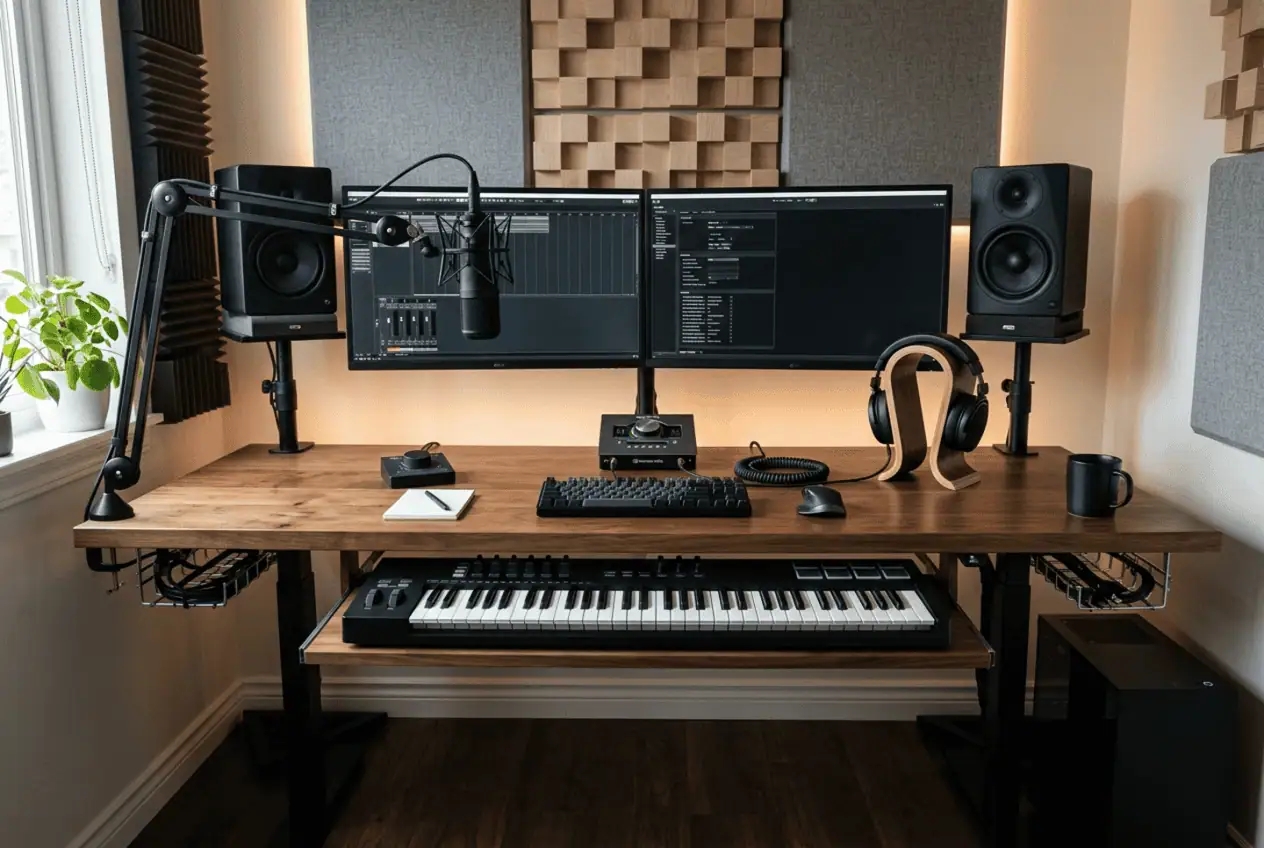
Your audio interface probably started with one USB cable, one microphone, and a pair of studio monitors. Then every new microphone, studio monitor, USB hub, or MIDI controller added another cable until reaching the back of your audio interface became frustrating. Before long, your studio desk became harder to use because simple tasks like replacing one cable or adding new gear took much longer than they should.
The good news is you do not need to disconnect your entire home recording studio to fix the problem. A better cable routing system, a few smart cable management habits, and the right accessories can organize your workspace while making future upgrades much easier.
Why Your Audio Interface Setup Keeps Getting Messier
Cable clutter usually does not happen because you bought the wrong equipment.
It happens because every new device follows its own cable path.
Your audio interface sits at the center of your recording setup. It connects to your desktop PC or MacBook, microphones, studio monitors, headphones, MIDI controllers, USB hubs, webcams, and other equipment. Every connection adds another cable behind your desk.
Many people fix this by pulling every cable into one large bundle.
It looks clean for a while.
Then the setup grows.
You replace a Focusrite Scarlett 2i2 with a Universal Audio Apollo Twin. You add an Audient iD14, a second monitor, or another microphone. Now you have to cut zip ties, separate cables, and rebuild everything just to add one device.
That is why good audio interface cable management is not about hiding cables.
It is about building a cable management system that stays organized as your recording setup changes.
When every cable has its own route, upgrades become easier, troubleshooting takes less time, and your workspace stays clean without starting over every few months.
Build Cable Paths That Stay Organized as Your Setup Grows
A clean setup starts before you connect the first cable.
Instead of plugging everything in and organizing it later, plan where every cable should go first.
Think of your workspace as several separate cable paths instead of one large bundle.
That simple change makes cable routing easier today and even easier when your setup grows.
Way 1. Plan Your Cable Paths Before Connecting Anything
Before connecting your audio interface, decide how every cable will travel across or under your desk.
Create separate paths for:
- Power cables
- USB cables
- XLR microphone cables
- TRS monitor cables
- MIDI cables
- Other accessories such as webcams or USB hubs
This keeps your recording setup organized from the beginning.
For example, if your USB cable follows its own cable path, replacing your audio interface later only takes a few minutes.
If it is tied together with every other cable, even a small upgrade becomes a much bigger job.
Planning first also makes troubleshooting easier because every cable has a clear starting point and destination.
Way 2. Separate Cable Types Instead of Creating One Large Bundle
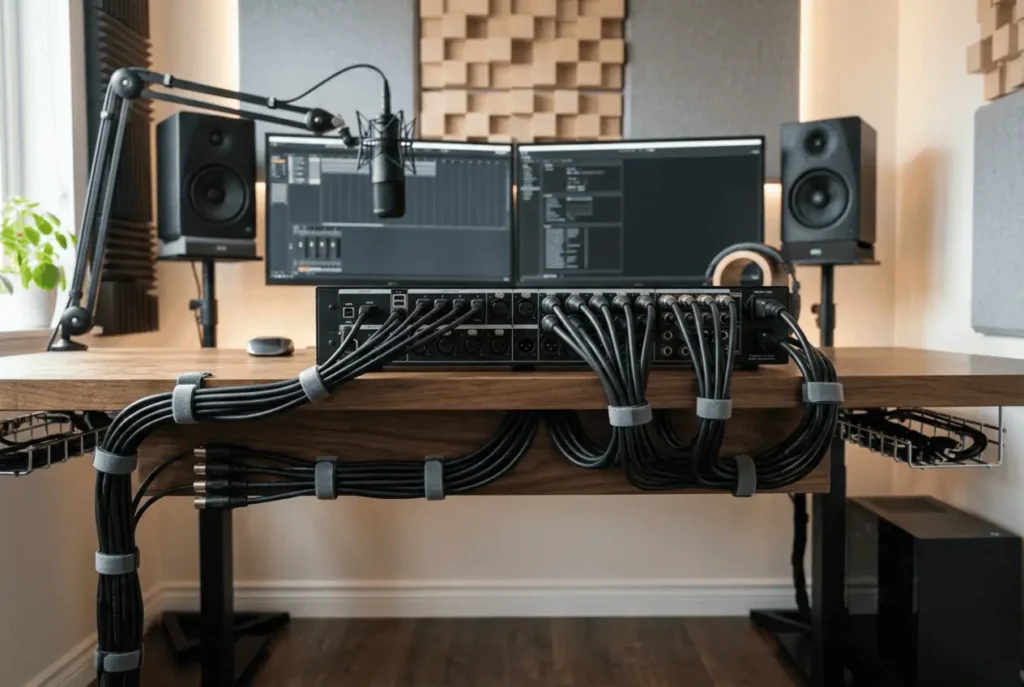
One large cable bundle may look tidy, but it quickly becomes difficult to manage.
Instead, create smaller cable bundles based on the cable type.
Keep USB cables together.
Keep XLR microphone cables together.
Keep TRS monitor cables together.
Keep power cables together.
Keep MIDI cables together.
This simple system makes cable organization much easier because every cable serves a clear purpose.
If your microphone suddenly stops working, you only need to check the XLR cable path instead of searching through every cable behind your studio desk.
Smaller bundles also make upgrades much faster because you only open one group instead of rebuilding your entire cable management system.
Way 3. Keep Power Cables Away from Audio Cables Whenever Possible
Messy cable routing is not the only problem.
Poor cable placement can also make your setup harder to manage.
When possible, avoid running power cables beside XLR or TRS audio cables for long distances.
If the cables need to cross, letting them cross at roughly a right angle is a common practice that can help reduce the chance of unwanted electrical interference.
This also keeps your cable paths easier to follow.
For example, power cables can stay along one side of your desk while signal cables follow another route.
The result is a cleaner workspace that is easier to upgrade and easier to troubleshoot.
Way 4. Leave Room for Future Upgrades
💡 Pro Tip
Whenever you add new equipment, route its cable immediately instead of leaving it loose “for now.” Spending five extra minutes today can save hours of untangling cables later.
Most recording setups never stay the same.
You might buy another microphone next month.
You might add a second monitor, powered speakers, a boom arm, or a larger audio interface like the MOTU M2 or PreSonus Studio 24c.
If every cable tray, cable clip, and cable bundle is already full, adding one more cable means taking everything apart.
Instead, leave a little empty space in your cable management system.
Do not tighten every reusable hook-and-loop strap as much as possible.
Leave one or two cable clips available for future equipment.
If you use an under-desk cable tray or cable raceway, avoid filling it completely.
Planning for future upgrades today saves hours of work later.
A cable management system should grow with your recording workflow instead of slowing it down.
Choose Cable Lengths That Work for Your Desk
Buying the right cable length is one of the easiest ways to reduce cable clutter.
Many recording setups use cables that are much longer than necessary.
The extra length ends up behind the audio interface, under the desk, or hanging beside the workspace.
Large cable loops collect dust, catch other cables, and make cable routing harder to follow.
Way 5. Choose the Right Cable Length and Manage Extra Slack
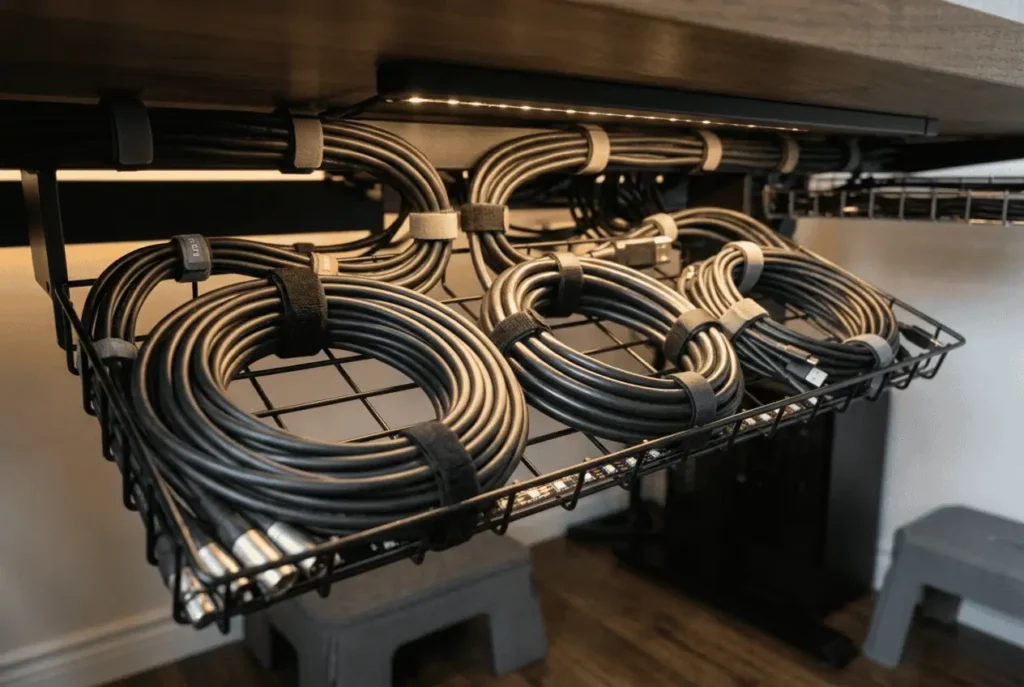
Choose the shortest cable that comfortably reaches without putting tension on the connector.
This applies to USB cables, XLR microphone cables, TRS monitor cables, MIDI cables, and power cables.
If replacing every cable is not practical, coil the extra slack neatly near the end of the cable instead of stuffing it behind your audio interface.
Secure each coil with reusable Velcro straps and keep every coil separate.
Avoid stacking several coils together because they quickly become difficult to identify later.
A clean cable path is easier to trace, easier to maintain, and much easier to upgrade when your recording setup changes.
Choose Cable Management Accessories That Make Future Upgrades Easier
By this point, your cable routing should already be organized. Now it is time to keep that system in place.
Many people buy cable organizers first and plan their routing later. It works much better the other way around. Good cable routing solves most cable problems. The right accessories simply keep that system organized over time.
Way 6. Replace Zip Ties with Reusable Velcro Straps
Zip ties make cable bundles look neat.
The problem starts when your setup changes.
You buy another microphone.
You upgrade from a Behringer UMC202HD to a Universal Audio Apollo Twin.
The same thing happens if you move to a Focusrite Scarlett 4i4, Audient iD14, or MOTU M2.
You add another monitor.
You install a USB hub.
Now every zip tie has to be cut before adding one cable.
Reusable hook-and-loop straps, often called Velcro straps, solve this problem much better.
They hold cables securely while allowing you to open the bundle in seconds.
Do not pull each strap as tightly as possible.
Leave a little space inside every bundle so cables can move naturally without being squeezed together.
This protects the cables from unnecessary strain while making future upgrades much faster.
For most home recording studios, reusable Velcro straps are one of the smartest cable management accessories you can buy.
Way 7. Use Cable Clips for Everyday Cables and Cable Sleeves for Permanent Cable Runs
Many people use cable sleeves for every cable.
That often creates another problem.
Every time you replace your audio interface or add another USB device, you have to open the entire sleeve.
Instead, use each accessory for the job it does best.
Cable clips work well for cables you touch every day.
For example:
- Headphone cables
- USB charging cables
- Microphone cables
- Camera cables
Cable sleeves work better for cable runs that rarely change.
Examples include:
- Computer to desk cables
- Monitor cables
- Permanent USB connections
This keeps your workspace organized while making future upgrades much easier.
Way 8. Keep Cables Off the Floor with an Under-Desk Cable Tray or Cable Raceway
Many people hide cables behind the audio interface.
The problem is that everything stays visible and difficult to reach.
Instead, move the main cable routing underneath the desk.
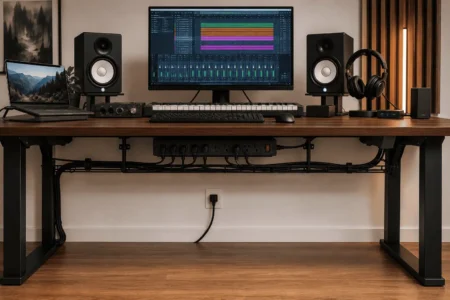
An under-desk cable tray supports larger cable bundles and keeps them away from your feet.
A cable raceway works well when cables need to follow the back edge or underside of the desk.
Both options improve cable organization while making the desktop look much cleaner.
Leave only the small section of cable needed to reach the audio interface.
Everything else should follow a planned cable path underneath the desk.
This also makes cleaning around your workspace much easier.
Way 9. Keep Power Bricks and Wall Adapters Under Control
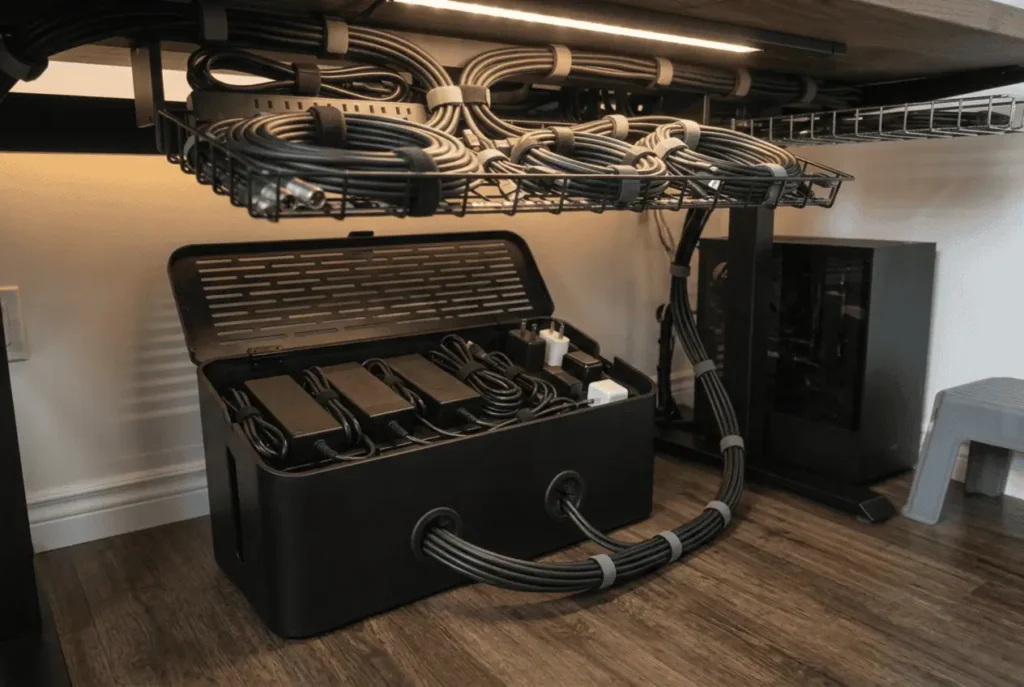
Power bricks often create more clutter than the cables themselves.
Large wall adapters quickly fill the floor space below your desk and make cable routing difficult.
Instead of letting them pile up, mount your power strip underneath the desk or place bulky power bricks inside a cable management box.
If several adapters sit together, leave enough space between them instead of stacking them tightly.
This keeps the area cleaner, improves airflow around the adapters, and prevents heavy power bricks from pulling on connected cables.
A simple change like this can make the entire recording setup look far more organized.
Build a Setup That Is Easy to Upgrade
Many cable management guides focus on making a setup look clean.
Very few explain how to keep it clean after adding more equipment.
That is where most recording setups fail.
Every new microphone, MIDI controller, webcam, or USB hub should fit into your existing cable routing without forcing you to rebuild everything.
Way 10. Label Both Ends of Every Cable
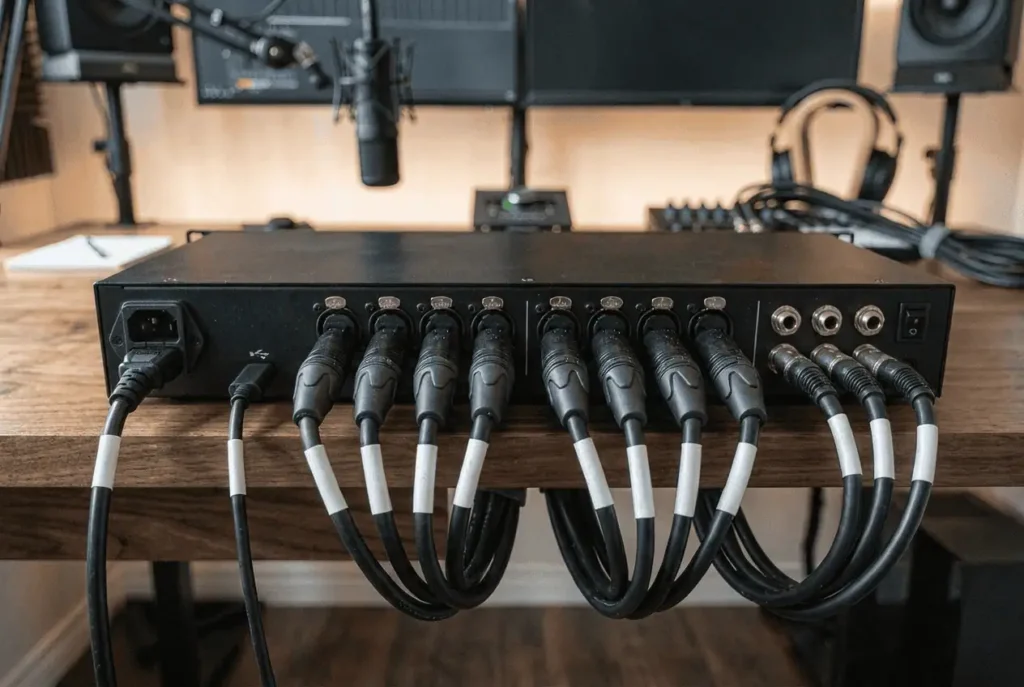
At first, every cable is easy to recognize.
A few months later, most cables look exactly the same.
Troubleshooting becomes slow because you have to trace every cable by hand.
Instead, place a label on both ends of every cable.
Simple labels work well.
Examples include:
- Computer USB
- Left Monitor
- Right Monitor
- Microphone
- MIDI Keyboard
You can also use color-coded cable labels to separate USB cables, power cables, and audio cables at a glance.
This small step saves time every time you replace equipment or reorganize your recording setup.
Way 11. Keep Frequently Moved Cables Outside Permanent Bundles
Some cables stay connected for years.
Others move almost every day.
Headphones, podcast microphones, guitars, cameras, portable audio recorders, and charging cables are often plugged in and unplugged.
Do not lock these cables inside permanent cable bundles.
Instead, give them their own cable path where they can move freely.
This reduces wear on the connectors, prevents cables from pulling on nearby equipment, and makes everyday recording much more convenient.
Keeping frequently used cables accessible also keeps your workspace looking organized throughout the day.
Solve the Problems That Keep Your Setup Organized
A clean setup is easy to create.
Keeping it clean is the real challenge.
Most cable clutter returns after adding new gear or making small changes over time. The next four steps help your cable management system stay organized without rebuilding your entire recording setup.
Way 12. Use a Patch Bay if You Constantly Swap Audio Gear
If you regularly connect different microphones, instruments, or rack equipment, reaching behind your audio interface quickly becomes frustrating.
Instead of unplugging cables from the back of the interface every time, a patch bay brings those connections to one easy-to-reach place.
A patch bay will not reduce the number of cables in your home recording studio.
What it does is reduce cable swapping behind your desk.
If your setup includes several microphones, outboard gear, or multiple audio sources, this can save time and reduce wear on the ports of your audio interface.
For smaller desktop setups with only one microphone and one pair of studio monitors, a patch bay is usually unnecessary.
Way 13. Fix an Already Messy Audio Interface Setup Before Buying More Accessories
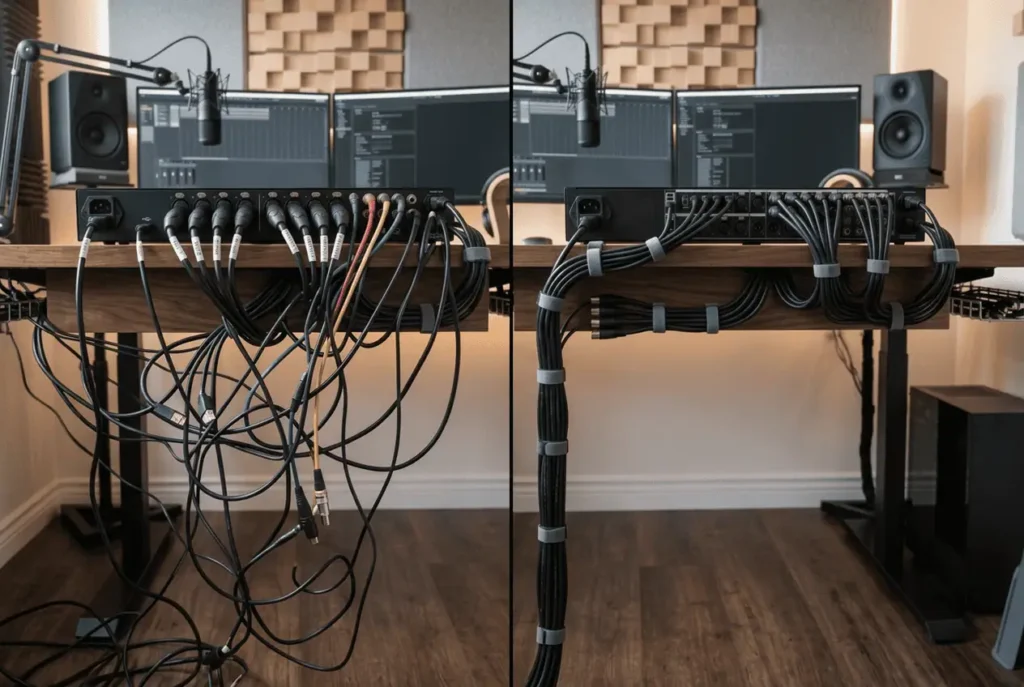
Buying more cable organizers will not solve a messy setup if the cables are already tangled.
Start by removing any equipment you no longer use. There is no point organizing cables that no longer serve a purpose.
Instead of one large tangled bundle behind your desk, separate your USB, XLR, TRS, MIDI, and power cables into their own groups. This immediately makes every cable easier to trace, replace, and upgrade later.
Once the cables are grouped, reconnect one device at a time instead of plugging everything back in at once.
Secure each cable group with reusable Velcro straps and route the larger bundles through an under-desk cable tray or cable raceway.
Taking a little extra time now creates a cable management system that is much easier to maintain every time your recording setup grows.
Way 14. Avoid the Mistakes That Keep Bringing Cable Clutter Back
Many recording setups become messy again because of the same small mistakes.
Avoid these common problems:
- Using cables that are much longer than needed.
- Pulling cable bundles too tightly.
- Mixing power cables with signal cables.
- Filling every cable tray or cable clip with no room for upgrades.
- Ignoring cable routing after adding new equipment.
These mistakes usually seem harmless at first.
Months later they create another cable mess that takes hours to fix.
Small changes today prevent much bigger problems later.
Way 15. Treat Cable Management as Part of Your Recording Workflow
Cable management is not a one-time project.
Your recording setup changes over time, so your cable routing should change with it.
Whenever you add a new microphone, monitor stand, boom arm, USB hub, webcam, or powered speaker, take a few extra minutes to place the new cable into the correct cable path.
Remove cables you no longer use.
Replace temporary cable routing before it becomes permanent.
Tighten loose Velcro straps.
Check that heavy power bricks are still supported and that cables are not pulling on the back of your audio interface.
Small adjustments take only a few minutes, but they keep your workspace organized throughout the year.
Conclusion
Good audio interface cable management is not about hiding every cable. It is about creating a system that stays organized as your recording setup grows. Plan your cable routing first, separate cable types, choose practical cable lengths, and use accessories that make future upgrades easier instead of harder. Once every cable has a clear place, adding another microphone, audio interface, or studio monitor becomes a simple upgrade instead of another afternoon spent untangling cables.
FAQs
How often should I reorganize my audio interface cables?
You do not need to reorganize your entire setup often. Check your cable routing whenever you add new equipment or every few months to keep cable clutter from building up.
Are wireless devices a good replacement for cable management?
Wireless devices can reduce the number of cables on your desk, but your audio interface, studio monitors, and microphones still need wired connections for reliable performance and low latency.
Can cable management improve airflow around my desk?
Yes. Organizing cables under the desk instead of piling them behind your equipment improves airflow, reduces dust buildup, and makes cleaning your workspace much easier.
Should I unplug my entire setup before reorganizing cables?
Not always. If you only need to tidy one section, you can work one cable group at a time. For a heavily tangled setup, disconnecting everything first usually gives the cleanest result.
What should I do with cables that I no longer use?
Remove unused cables instead of leaving them behind your desk. Store them separately with a label so they are easy to find if you need them again.
Can cable management help protect my audio interface?
Yes. Proper cable routing reduces strain on USB, XLR, and power connectors, lowering the chance of accidental pulls or damage when moving equipment.