


Using a Quest Link cable should make PC VR more enjoyable, not more frustrating. If the cable keeps pulling on your headset, dragging across the floor, or wrapping around your legs, it can quickly ruin the experience. Over time, constant pulling may also put extra pressure on the USB-C port.
The good news is that you don’t need a new cable to fix these problems. Whether you use a Meta Quest 3, Quest 3S, or Quest 2, a few simple cable management changes can reduce cable tug, improve cable routing, and make both seated and room-scale VR much more comfortable.
Why Your Quest Link Cable Keeps Getting in the Way
Most Quest Link cable problems happen because the cable moves differently than you do.
When you turn, crouch, or walk around, the cable drags behind you. As it catches on the floor or furniture, it starts pulling on the headset. After a few turns, it may wrap around your legs or twist behind your back.
You may notice problems like:
- The cable drags across the floor.
- You keep stepping on the cable.
- The cable wraps around your legs.
- The headset feels like it’s being pulled backward.
- The USB-C connector bends while you move.
- The cable twists after turning several times.
- The cable catches on a chair or desk.
The good news is that most of these problems have simple fixes.
For example:
- Cable dragging across the floor → Lift it with overhead cable routing.
- Headset pulling backward → Add proper strain relief.
- Cable wrapping around your legs → Route it behind your body.
- Too much cable tension → Adjust the cable slack.
- Pressure on the USB-C connector → Use a right-angle adapter.
Start with the problem that annoys you the most. You don’t need to use every method below. For many Quest users, fixing just one problem makes PC VR feel much smoother.
8 Ways to Improve Quest Link Cable Management
Every VR setup is different, so there isn’t one solution for everyone. Choose the method that matches your biggest problem first. If you still notice cable tug, combine two or three of these methods for even better results.
Install a Ceiling Pulley System
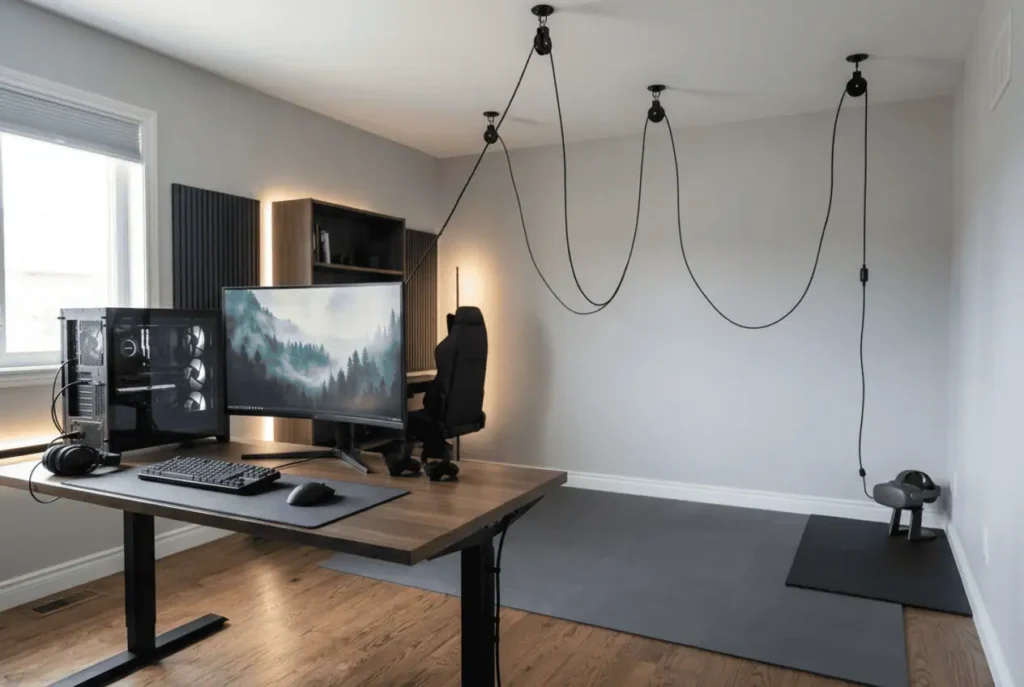
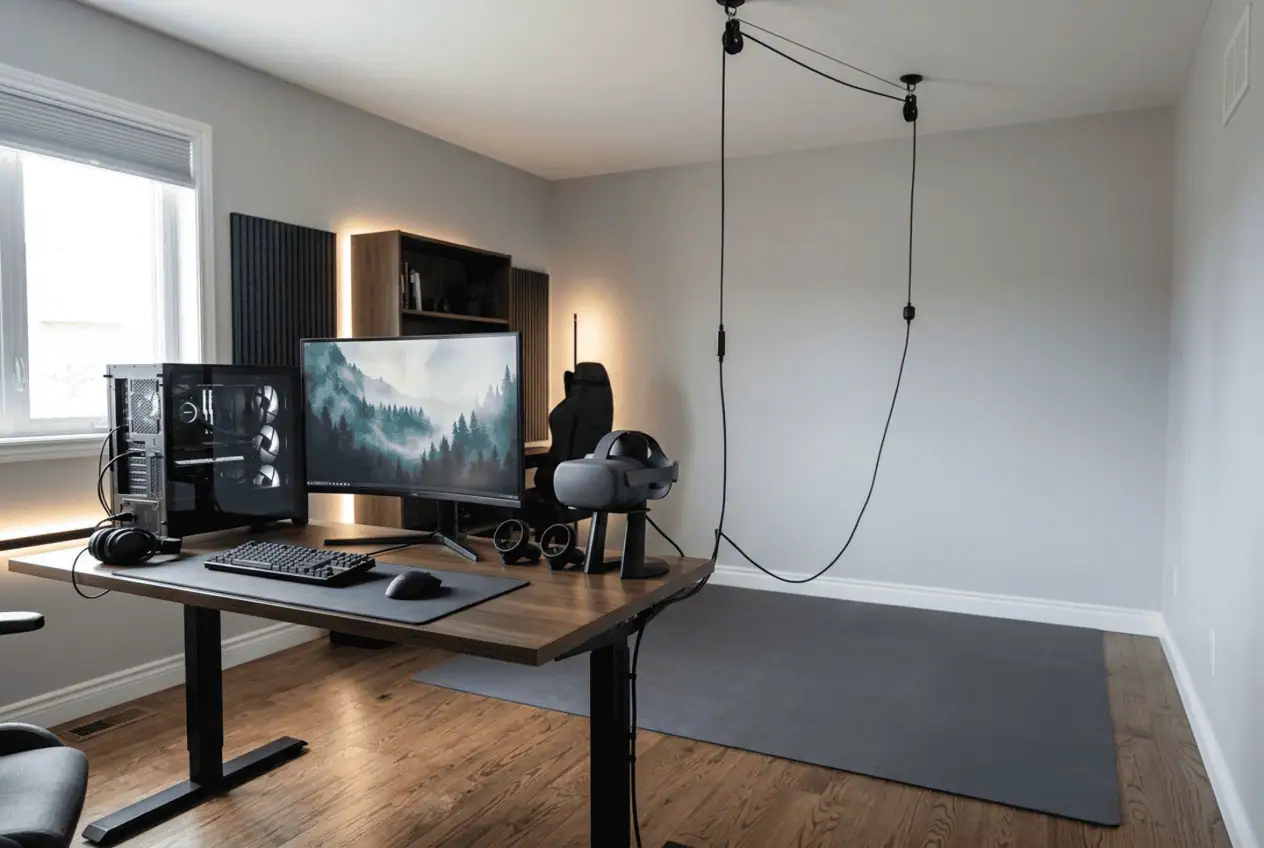
If you keep stepping on your Quest Link cable or feel it dragging behind you, a ceiling pulley system is usually the fastest fix.
Instead of lying on the floor, the cable stays above your head and follows your movement. This greatly reduces cable drag and gives you more freedom to turn without feeling the cable pulling on the headset.
A retractable pulley also keeps gentle cable tension, allowing the cable to move naturally while preventing large loops from hanging around your play space.
For the best results:
- Place the first pulley slightly behind where you normally stand.
- Space the remaining pulleys evenly across your play area.
- Leave enough cable for natural movement.
- Avoid pulling the cable completely tight.
- Let the cable hang behind your shoulder instead of in front.
Overhead cable routing works especially well for room-scale VR because the cable rarely touches the floor. That means fewer tangles, less cable drag, and a much lower chance of stepping on the cable.
If you play games where you constantly turn, duck, or move around, this is usually the first upgrade worth making.
Route the Cable Along Your Head Strap for Better Strain Relief
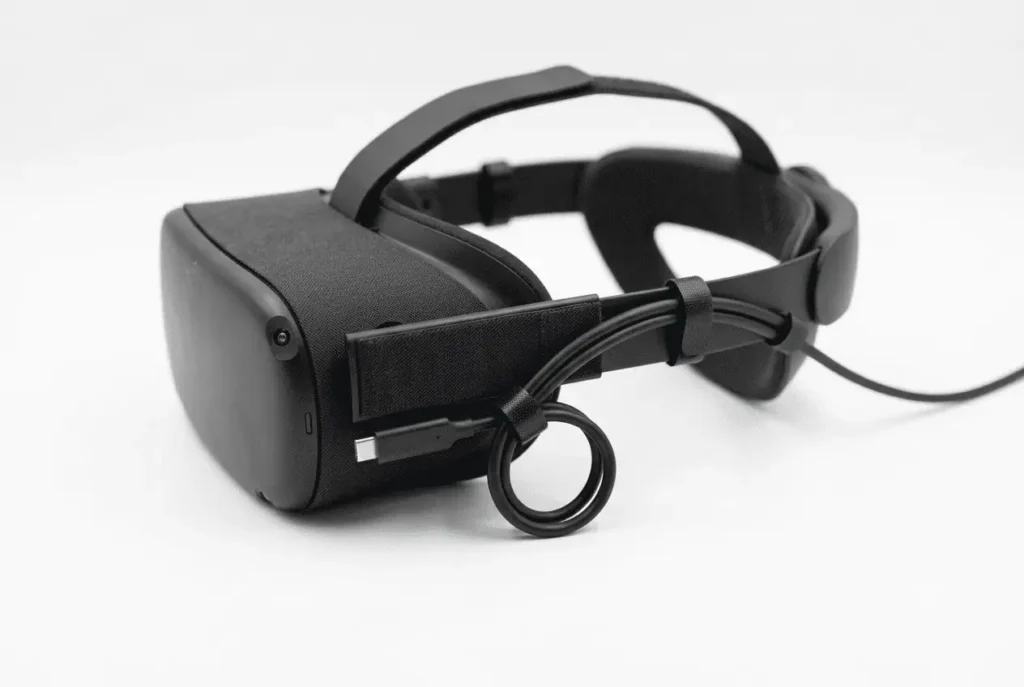
If the cable keeps pulling on your headset every time you move, the problem is usually a lack of strain relief.
When the Quest Link cable hangs directly from the headset, every head movement puts pressure on the USB-C connector. Over time, that constant movement can make the cable feel heavier than it actually is.
Instead, secure the cable to the head strap before it reaches the headset.
You can use:
- Velcro cable ties
- Soft cable clips
- Reusable hook-and-loop straps
Leave a small service loop between the headset and the first cable tie. This allows the connector to move naturally without carrying the full weight of the cable.
Many Quest users notice that the headset immediately feels lighter because the cable is no longer hanging from one side.
If you still feel the cable pulling after adding strain relief, combine this method with a right-angle USB-C adapter for even better cable routing.
Leave Enough Cable Slack
If the cable feels tight every time you look down or catches your feet while turning, the cable slack probably needs adjusting.
Too little slack increases cable tension and constantly pulls on the headset.
Too much slack creates a different problem. The cable begins dragging across the floor, wrapping around your legs, or catching under your feet.
The goal is to find a balance where the cable moves with you without becoming loose.
A simple way to check is to leave a small service loop between the headset and the first cable support.
Then test your setup by:
- Looking left and right.
- Looking up and down.
- Turning in a full circle.
- Crouching once.
- Taking a few steps around your play space.
If the cable moves freely without pulling or dragging, you’ve found the right amount of slack.
Spending a few minutes adjusting cable slack often improves comfort more than buying another accessory.
Use a Right-Angle USB-C Adapter
If you’re worried about damaging the USB-C port on your Quest headset, a right-angle USB-C adapter is one of the easiest upgrades you can make.
A straight connector sticks out from the side of the headset where it is more likely to be bumped or pulled.
A right-angle adapter changes the direction of the Quest Link cable so it follows the side or back of the head strap instead. This creates cleaner cable routing while reducing stress on the connector.
When choosing an adapter, look for one that:
- Fits your Quest headset securely.
- Supports high-speed data transfer for Quest Link.
- Does not wobble during movement.
- Keeps the cable close to the head strap.
A right-angle adapter works best when used together with proper strain relief. Combined, they reduce cable movement, lower stress on the USB-C connector, and make the Quest Link cable much less noticeable during long PC VR sessions.
Keep the Cable Behind Your Body
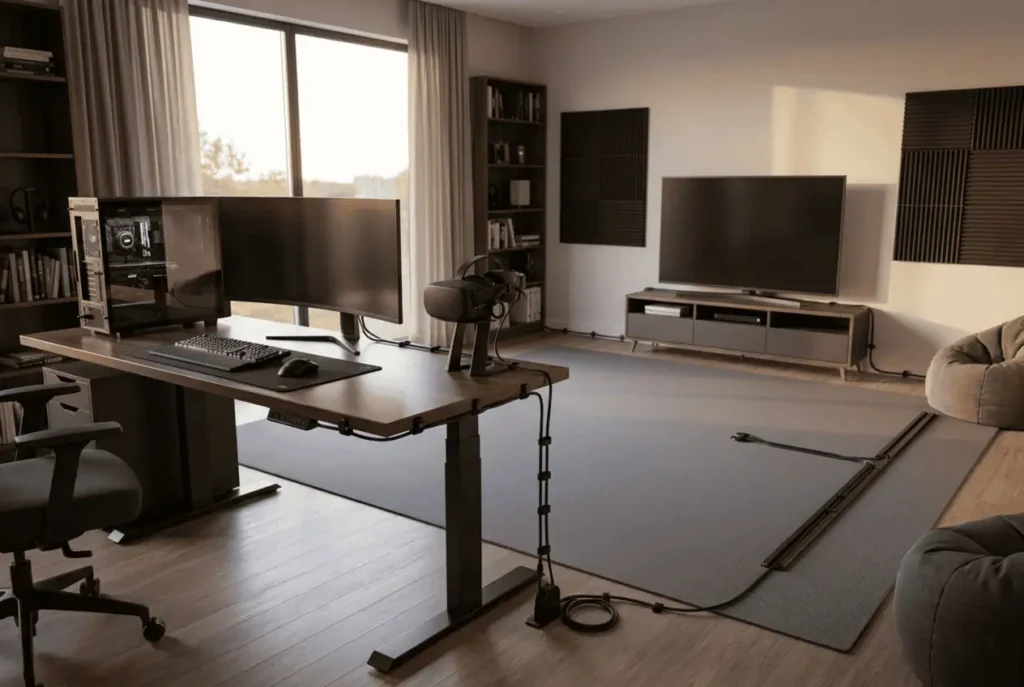
If your Quest Link cable keeps wrapping around your legs or brushing against your arms, changing the cable path is usually all you need. Keeping the cable behind your body reduces cable tug and makes turning feel much smoother.
Instead of letting the cable hang beside you, guide it behind your back before it reaches the floor.
Simple ways to do this include:
- Clip the cable to your shirt.
- Attach it to your belt or waistband.
- Route it behind one shoulder.
- Keep the cable close to your back instead of your side.
After making the change, turn around a few times before starting your game. If the cable stays behind you without pulling or swinging around your body, the routing is working properly.
This method works well for both standing VR and seated VR. If you also use a ceiling pulley system, keeping the cable behind your body creates an even smoother movement because the cable follows you instead of fighting against your movements.
Add Cable Clips or Cable Sleeves
If your Quest Link cable keeps catching on your desk, chair, or furniture, you don’t always need to rearrange your entire setup. A few cable clips or a cable sleeve can guide the cable along a cleaner path and stop it from snagging on nearby objects.
Many cable problems happen before the cable even reaches the headset.
Cable clips help by:
- Routing the cable along a desk or wall.
- Keeping it away from chair legs.
- Preventing the cable from rubbing against sharp corners.
- Holding the cable where you want it.
Cable sleeves help by:
- Protecting longer sections of the cable.
- Reducing cable twisting.
- Keeping multiple cables together.
- Making the setup look cleaner.
These accessories are inexpensive, easy to install, and often solve cable routing problems without changing the rest of your VR setup.
Keep Your VR Play Space Clear
If you keep stepping on your Quest Link cable, the problem may not be the cable itself. Your play space may be forcing the cable into your walking path.
Before every PC VR session, spend a few seconds checking the area around you.
Move anything that could catch the cable, including:
- Chairs with wheels
- Small tables
- Floor lamps
- Storage boxes
- Pet beds
- Loose charging cables
If the cable has to cross the floor, keep it close to the edge of your play space instead of running through the middle.
If you play room-scale VR, try turning around a few times before starting your game. If the cable catches on anything, adjust the cable routing before you begin.
This quick check takes less than a minute but helps prevent cable snags, unexpected pulling, and interruptions while playing.
Replace a Worn Quest Link Cable Before It Fails
If you’ve already improved the cable routing but still get random disconnects or the cable keeps cutting out, the problem may be the cable itself.
Cable management improves movement, but it cannot repair a damaged Quest Link cable.
Check your cable for signs of wear, including:
- Frayed outer jacket
- Loose USB-C connector
- Bent connector
- Deep cable kinks
- Random disconnects
- Cable getting unusually warm
- Visible damage near either connector
If you notice one or more of these problems, replacing the cable early is usually the better option.
Waiting until the cable completely fails can interrupt your PC VR sessions and may place unnecessary stress on the headset’s USB-C port.
Common Cable Management Mistakes
Even a good setup can become frustrating if you make a few simple mistakes.
Avoid these common problems.
Letting the Cable Twist
Turning in the same direction over and over slowly twists the Quest Link cable.
After each gaming session, let the cable hang straight for a few minutes before storing it.
If the cable already feels twisted, gently untwist it instead of forcing it into a tight loop.
This helps reduce cable stress and may extend the cable’s life.
Running the Cable Across Your Walking Path
A cable stretched through the middle of your play space is easy to step on.
Instead, route it:
- Along a wall
- Behind your body
- Above your head with overhead cable routing
Keeping the cable away from your walking path reduces cable drag and lowers the chance of tripping during room-scale VR.
Ignoring Small Cable Problems
Many Quest users continue using a cable after it starts bending, pulling, or disconnecting.
Small problems usually become bigger over time.
If the cable starts pulling more than usual, first check the cable routing and cable slack.
If the problem continues, inspect the cable for damage before your next PC VR session.
Fixing small issues early can help protect both the Quest Link cable and the headset’s USB-C connector.
Accessories That Make Quest Link Cable Management Easier
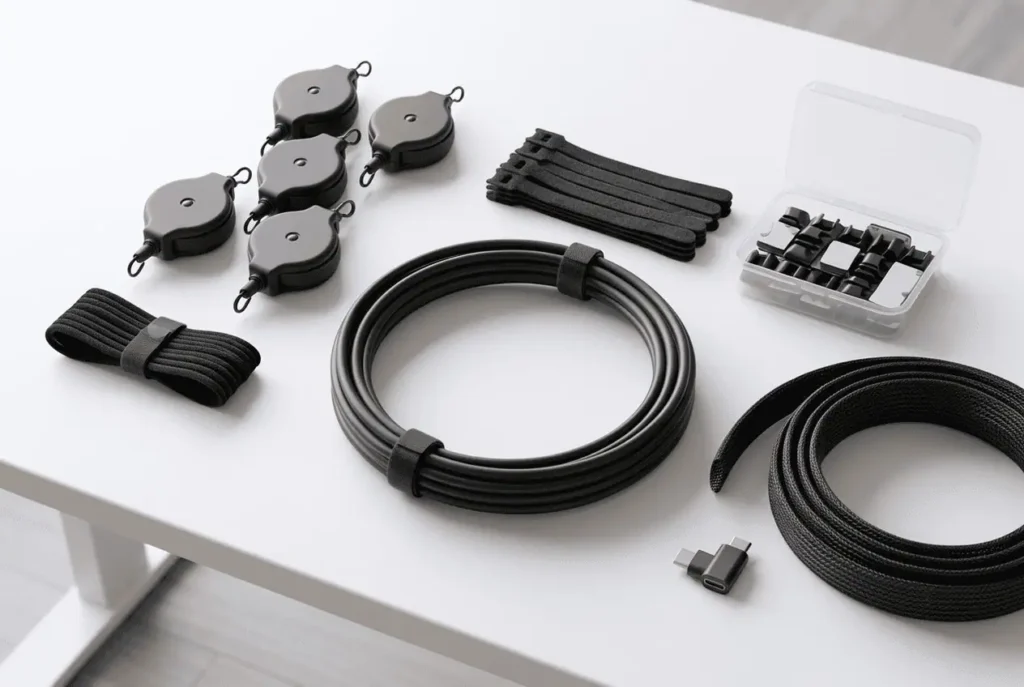
You don’t need to buy every accessory.
Start with the one that solves your biggest problem. Many Quest users only need one or two accessories to make PC VR much more comfortable.
Ceiling Pulley Kits
Best for players who want maximum freedom during room-scale VR.
A retractable pulley lifts the Quest Link cable above your play space, reducing cable drag and keeping the cable away from your feet.
Velcro Cable Ties
Best for creating strain relief.
Secure the cable to the head strap while leaving a small service loop near the headset. This reduces pressure on the USB-C connector during movement.
Cable Clips
Best for improving cable routing.
Use them to guide the cable along desks, walls, or furniture so it stays away from your walking area.
Cable Sleeves
Best for protecting longer cable sections.
They reduce rubbing against furniture and keep your setup looking cleaner.
Right-Angle USB-C Adapters
Best for protecting the headset’s USB-C port.
They direct the Quest Link cable toward the back of the head strap instead of letting it stick straight out from the side of the headset.
Conclusion
You don’t need an expensive upgrade to enjoy better Quest Link cable management. Start with the method that fixes your biggest problem, whether that’s cable drag, cable tug, USB-C port strain, or the cable wrapping around your legs. Test the change during your next PC VR session before adding more accessories. For many Quest users, one small adjustment is enough to make the cable feel lighter, move more naturally, and stay out of the way so you can focus on the game instead of the cable.
FAQs
Can I use a Quest Link cable with an Elite Strap?
Yes. Most Elite Straps work with a Quest Link cable. Just route the cable along the strap and leave a small service loop near the headset for comfortable movement.
Does cable management affect Quest Link latency?
No. Cable management does not reduce latency or improve image quality. It simply makes the cable easier to handle and more comfortable during PC VR sessions.
Is a longer Quest Link cable harder to manage?
Yes. Longer cables provide more movement but are also more likely to drag, twist, or tangle. Good cable routing helps control the extra cable length.
Can I leave my Quest Link cable connected all the time?
You can, but unplugging it when you’re finished helps reduce unnecessary strain on the USB-C connector and makes storing the headset easier.
Are third-party cable management accessories safe to use?
Yes, as long as they don’t pinch, sharply bend, or put excessive pressure on the Quest Link cable or the headset’s USB-C port.
Should I replace my cable if it twists easily?
Not always. Mild twisting is normal after turning during VR. If the cable still works properly, untwist it and improve the cable routing before deciding to replace it.