

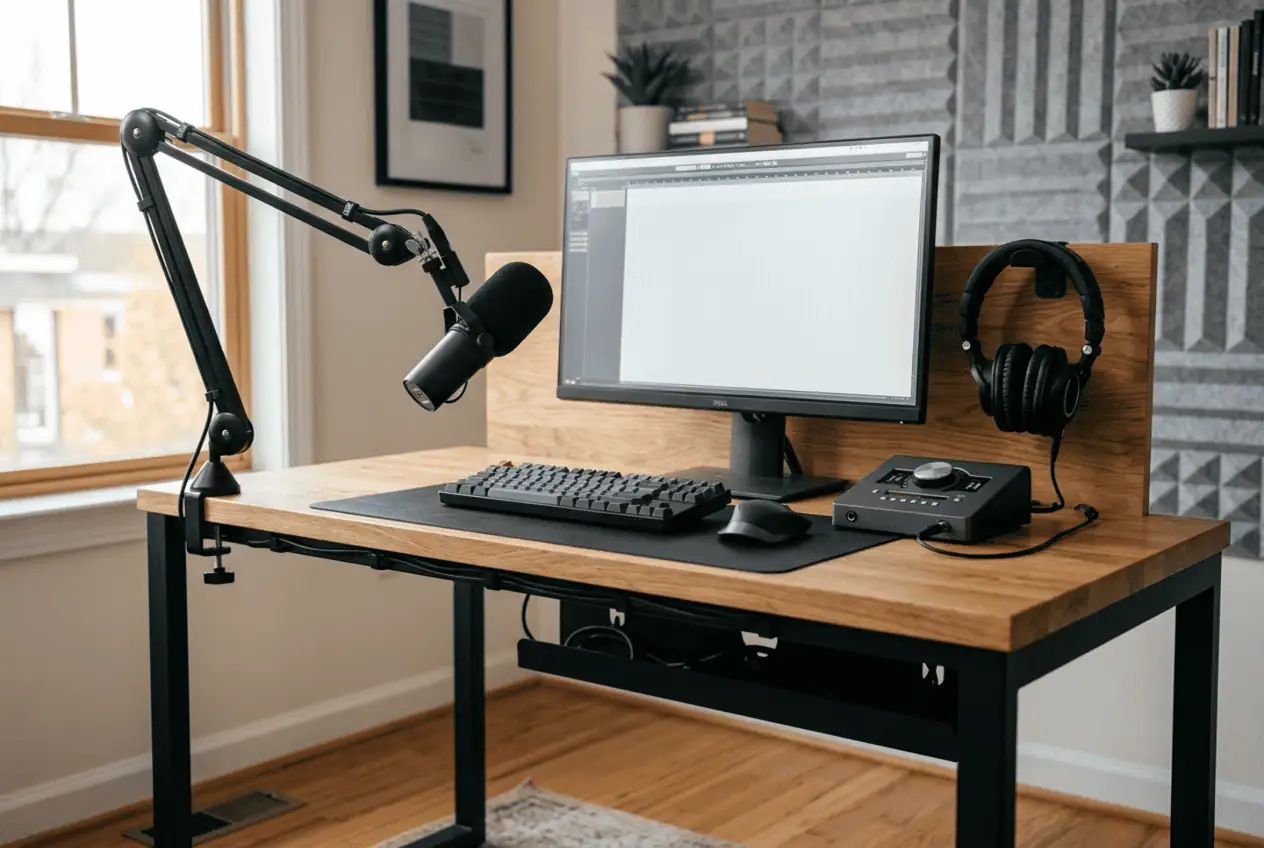
Your podcast desk shouldn’t slow down your recording. If microphone cables hang from the boom arm, USB wires cover your desk, or the power strip sits in plain sight, you’re probably wasting time before every episode. A messy setup can also make your workspace look unprofessional, especially if it appears on camera.
The good news is that you don’t need a new desk or expensive accessories. With a few simple cable management changes, you can organize your podcast workspace, hide the biggest cable mess, and make every recording session faster, cleaner, and easier.
Why Your Podcast Desk Still Looks Messy
If your podcast desk always looks cluttered, the problem usually isn’t having too many cables. It’s that every cable follows a different path. Microphone cables hang from your boom arm, USB cables spread across the desk, and the power strip becomes the point where everything connects.
The fastest way to fix the problem is to organize the cables you use every recording first.
That’s exactly what these 11 smart cable management tips will help you do. From hiding cables under your desk and routing microphone cables correctly to organizing USB devices, managing power cords, and labeling cables, each step solves a specific problem without rebuilding your entire setup.
Let’s start with the biggest source of cable clutter. Fixing one area at a time gives you faster results and makes the rest of your recording setup much easier to organize.
Start With the Biggest Cable Mess
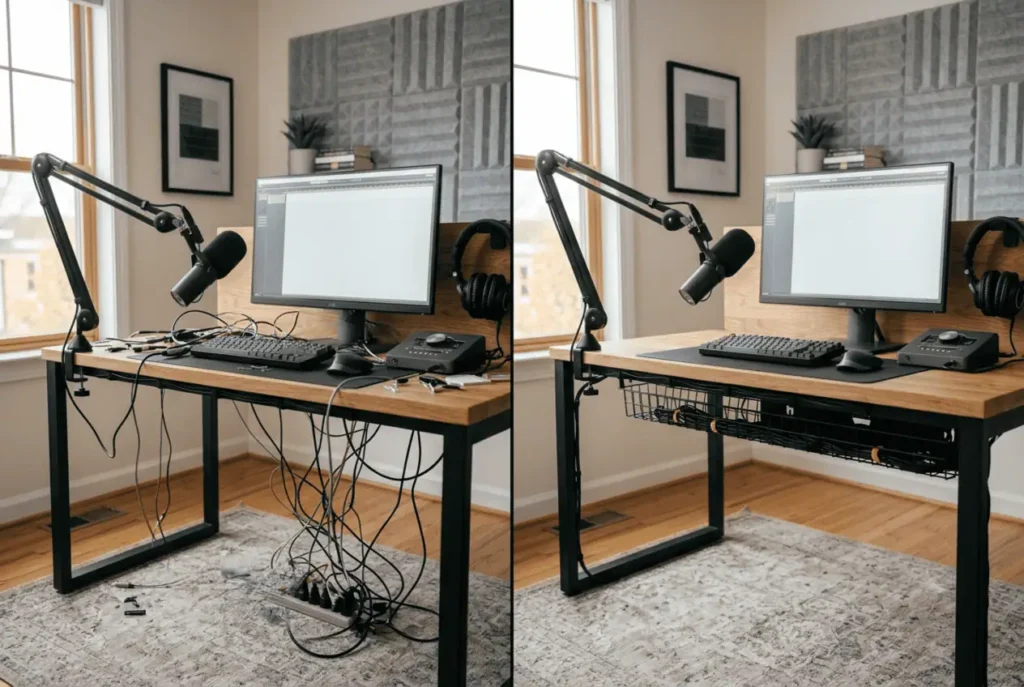
Don’t unplug every cable at once. Start with the cables creating the biggest mess. For most podcast desks, that’s the power strip, microphone cables, or USB hub. Once these are organized, everything else becomes much easier to manage.
Trying to fix the whole desk in one session often creates more confusion. Organize one area first, then move to the next. You’ll see progress faster and avoid reconnecting your entire setup.
Find the Cables You Use Every Recording
Focus on the cables that stay connected all the time. These create most of the clutter and should be organized before temporary cables.
Audio Cables
XLR and TRS cables connect your microphones, mixer, or audio interface.
These cables usually stay connected, so give them a permanent route instead of moving them after every recording.
If you use devices like a Rodecaster Pro, Zoom PodTrak, or Focusrite Scarlett, organize these audio cables before anything else.
USB Cables
USB cables often connect several devices, including:
- Audio interface
- USB microphone
- Webcam
- Stream Deck
- External SSD
- USB hub
These cables usually stay connected throughout every recording session, making them one of the first cable groups to organize.
Power Cables
Every device eventually connects to the power strip.
Instead of letting power cords spread across the floor, plan one clear route underneath the desk to keep them out of sight.
HDMI and Ethernet Cables
If you record video podcasts or livestreams, you may also have HDMI and Ethernet cables.
Because these cables rarely move, secure them early so they stay organized without needing regular adjustments.
Decide What Should Stay on Your Desk
Keeping only the equipment you use every recording creates more workspace and reduces visible cable clutter.
Permanent Equipment
These devices usually stay connected all the time:
- Monitor
- Shure SM7B or other podcast microphone
- Audio interface
- Microphone boom arm
- Mixer or Rodecaster Pro
- Speakers
- USB hub
Since these devices rarely move, create permanent cable routes for them.
Equipment You Move Often
Some equipment is only connected when needed, such as:
- Camera
- Laptop
- Portable recorder
- External hard drive
- Phone charging cable
Keep these cables easy to reach instead of hiding them inside tight cable bundles. This makes it easier to connect or disconnect devices without disturbing the rest of your recording setup.
Hide the Biggest Cable Mess Under Your Desk
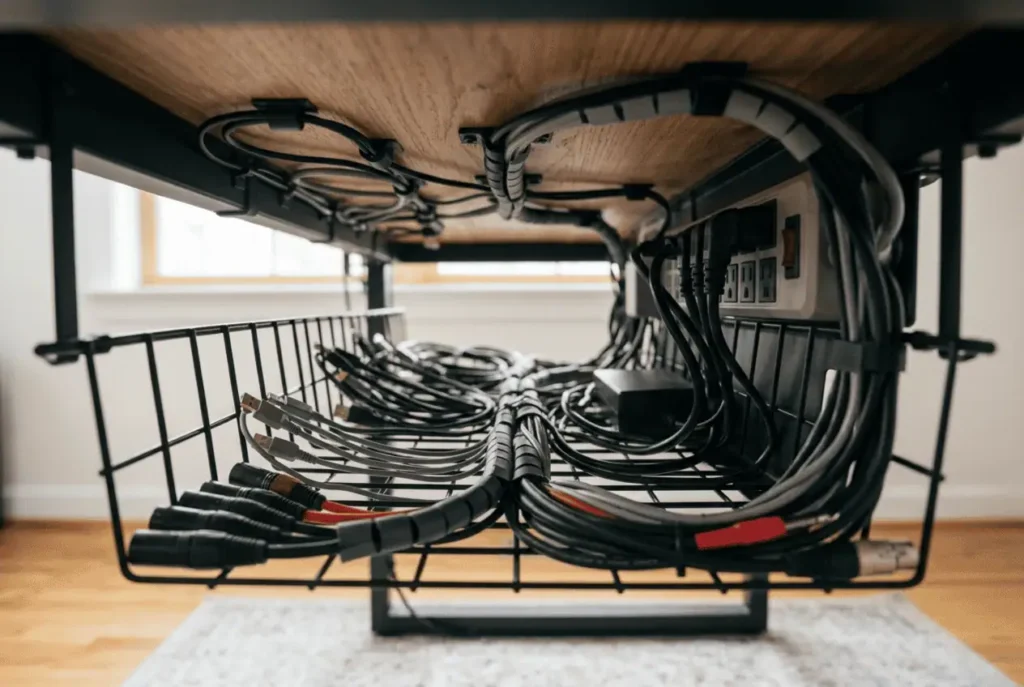
If cables hang behind your desk or get caught under your chair, moving them underneath the desk creates the biggest visual improvement. It also gives you more workspace and makes cleaning much easier.
Route Cables Under the Desk
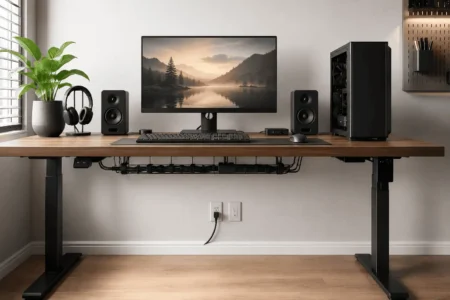
The underside of your desk is the best place for cables that stay connected every day.
Moving them off the desktop creates a cleaner workspace and helps prevent cables from getting pulled during recording.
Install an Under-Desk Cable Tray
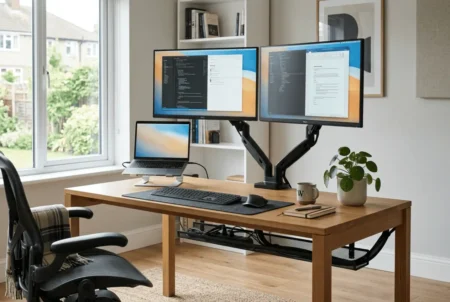
If most of your cables hang behind your desk, an under-desk cable tray is usually the first upgrade worth buying. It hides several cable types at once, keeps them off the floor, and makes future cable management much easier.
Use Desk Grommets for Cleaner Cable Routing
If your desk already has cable grommets, use them to route microphone, monitor, USB, and charging cables directly underneath the desk. This removes visible wires from your workspace and creates a cleaner recording setup.
If your desk doesn’t have built-in grommets, you can install aftermarket desk grommets when creating a permanent home podcast studio.
Use Adhesive Cable Clips
Some cables need their own path.
Use adhesive cable clips when a single cable needs its own route, such as a microphone cable, webcam cable, or phone charger.
Place the clips along the back or underside of the desk to keep cables from hanging loose.
Add Cable Raceways Where Needed
If cables travel down a desk leg or across a wall, install a cable raceway.
It hides visible wires, protects them from damage, and creates a cleaner background if your desk appears on camera.
Keep Audio and Power Cables Separate
If your recording picks up unwanted buzz or electrical noise, check how your cables are routed. Running XLR cables beside power cords for long distances can increase the chance of interference. Keeping them on separate routes helps create a cleaner cable layout and can make troubleshooting easier later.
When the two cable groups must cross, let them cross briefly instead of running side by side.
Keep Visible Desk Cables Organized
Once the larger cable bundles are hidden under your desk, you can focus on the smaller cables people notice first. These finishing touches improve both your workflow and the overall look of your podcast workspace.
Instead of trying to hide every cable, fix the cables you touch most often. A few small improvements can make your desk easier to use and much cleaner on camera.
Route Microphone Cables Along the Boom Arm
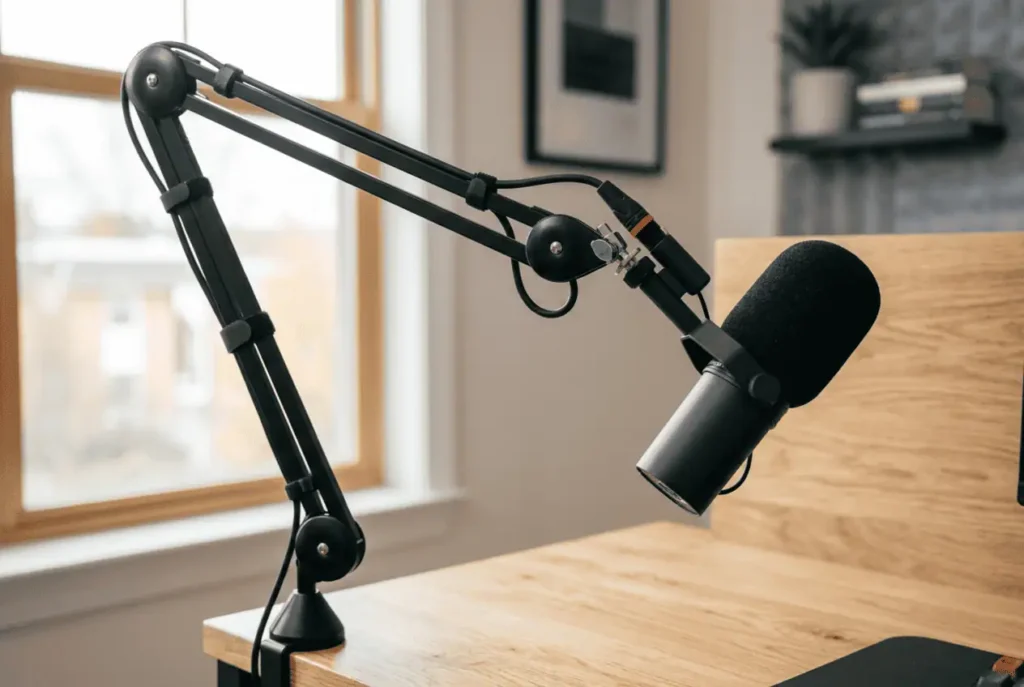
A loose microphone cable hanging from the boom arm is usually one of the first things people notice. It can also catch on your arm or pull the microphone when you adjust its position.
Secure the Cable to the Boom Arm
Route the XLR cable along the boom arm using built-in cable clips or reusable Velcro ties.
Keeping the cable close to the arm makes your workspace look tidier and prevents the cable from moving while you record.
Leave Enough Slack for Movement
Don’t pull the cable tight.
Leave a small amount of slack near each boom arm joint so the arm moves freely without putting pressure on the connector. This also helps reduce wear on the cable over time.
Choose the Right Boom Arm Mount
The mounting method also affects cable management.
A clamp-mounted boom arm works well for most home podcast studios because it’s easy to install and move.
If you’re building a permanent recording space, a desk grommet mount creates a cleaner look by routing the cable directly below the desk instead of over the edge.
Keep USB Devices Organized
USB cables become messy very quickly because several devices connect to the same computer.
Your setup may include a webcam, Stream Deck, Focusrite Scarlett, external SSD, USB hub, charging cable, and other accessories.
Place the USB Hub Near Your Equipment
Place the USB hub close to the devices that use it instead of beside your computer.
Shorter cable runs reduce clutter and make it easier to connect new equipment without rerouting existing cables.
Replace Cables That Are Too Long
Extra cable length creates unnecessary loops behind the desk.
If a cable is much longer than you need, replace it with a shorter one. This simple change often makes your desk look noticeably cleaner.
Move the Power Strip Out of Sight
For many podcasters, the power strip creates the biggest cable mess because every cable eventually leads to it.
Mount the Power Strip Under the Desk
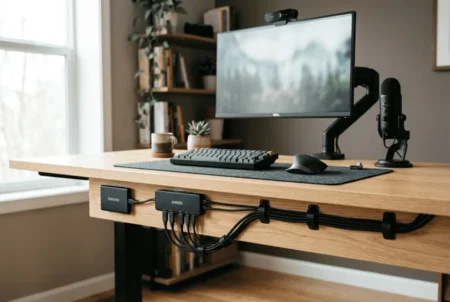
Mounting the power strip underneath the desk often removes the largest visible cable bundle in a single step.
It keeps plugs off the floor, shortens power cable runs, reduces dust around your outlets, and lowers the chance of accidentally pulling a cable loose while recording.
Keep Power Adapters Together
Large power adapters quickly create clutter underneath the desk.
Store them inside your cable tray or a cable management box instead of letting them hang below the desk.
Leave Room for Future Equipment
Most podcast setups grow over time.
You might add another microphone, monitor, camera, audio interface, or lighting equipment later.
Leave some empty space inside your cable tray and avoid packing every cable tightly together. Planning ahead now saves time when you upgrade your setup.
Stop Headphone Cables From Getting Tangled
Headphone cables often end up around chair legs or mixed with other wires after recording.
Giving them a dedicated storage place keeps your desk organized between sessions.
Use a Headphone Hook
Install a headphone hook under the desk or on the side of your workspace.
This keeps your headphones off the desk while protecting the cable from unnecessary bends.
Coil the Cable Loosely
Avoid wrapping the cable tightly around your headphones.
Instead, make a loose coil and secure it with a Velcro tie before hanging the headphones.
Store Spare XLR Cables Properly
If you keep spare microphone cables or record in different locations, store them correctly after each session.
Wrap XLR cables using the over-under method instead of winding them around your hand. This helps prevent twists, reduces stress on the cable, and keeps it ready for your next recording.
If you also use long microphone cables around your room, organize them separately from your desk cables. This makes storage easier and simplifies troubleshooting later.
Once your main cables are organized, a few small habits can keep your podcast desk looking clean every day. These final steps reduce clutter, make future upgrades easier, and help your recording setup stay organized without much extra effort.
You don’t need to hide every cable. Focus on the cables people notice first. Small improvements made over time usually create a better result than rebuilding your entire setup in one day.
Bundle Similar Cables Together
Keep cables that travel to the same place together.
For example, group USB cables separately from XLR and power cables. This creates a neater cable layout and makes it easier to identify each connection when you need to upgrade or troubleshoot.
Use Reusable Velcro Ties
Reusable Velcro ties keep cable bundles neat while making future changes easy.
Bundle cables loosely so they’re organized without putting pressure on connectors.
Cover Visible Wires With Cable Sleeves
Some cables cannot be hidden under the desk.
Use cable sleeves for the visible cable runs between your desk and computer or wall outlet. They combine several wires into one neat bundle while still allowing future changes.
Keep Monitor Arm and Webcam Cables Together
If your monitor is mounted on a monitor arm, route the monitor cable and webcam cable together whenever possible.
This keeps both cables out of sight, reduces clutter behind your monitor, and creates a cleaner background if your desk appears on camera.
Hide Excess Cable Length
Extra cable hanging behind the desk makes even an expensive setup look untidy.
Coil the unused length neatly, secure it with a Velcro tie, and store it inside your cable tray instead of leaving it on the floor.
Avoid making tight loops because they can put unnecessary strain on the cable over time.
Label Every Cable Before You Forget
If you’ve ever unplugged the wrong cable before recording, labels are one of the easiest solutions.
Mark both ends of important XLR, USB, HDMI, and power cables so you can reconnect equipment quickly after moving or upgrading your setup.
If you use a cable organizer, cable holder, or cable channel, label the cables before placing them inside. This makes future maintenance much easier because you won’t need to trace every cable through the entire bundle.
Use These Cable Management Tools Only When You Need Them
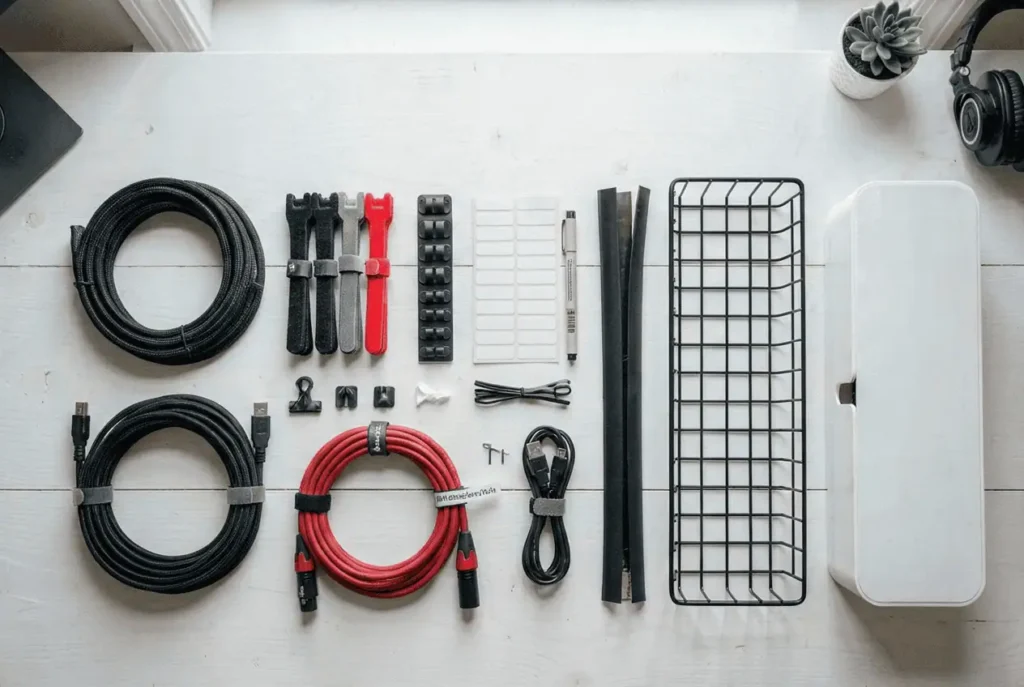
You don’t need every cable management accessory on this list. Start with the one that solves your biggest problem. For most podcasters, that’s an under-desk cable tray or a few reusable Velcro cable ties. Add more accessories only when your recording setup grows.
Under-Desk Cable Tray
If most of your cables hang behind your desk, an under-desk cable tray is usually the first upgrade worth buying. It hides several cable types at once, keeps them off the floor, and makes future cable management much easier.
Reusable Velcro Cable Ties
Choose reusable Velcro cable ties if you regularly add or remove equipment. They keep cable bundles neat while making future upgrades much easier than permanent zip ties.
Cable Sleeves
Cable sleeves work best for visible cable runs between your desk and your computer or wall outlet. They combine several wires into one neat bundle while still making future changes simple.
Adhesive Cable Clips
Use adhesive cable clips when a single cable needs its own route, such as a microphone cable, webcam cable, charging cable, or headphone cable. They stop cables from hanging loose and keep frequently used wires within easy reach.
Cable Labels
Label the cables you unplug most often, especially XLR, USB, HDMI, and power cables. Clear labels save time whenever you move equipment, replace a device, or troubleshoot connection problems.
Cable Management Box
A cable management box is a good option if mounting your power strip underneath the desk isn’t possible. It hides power adapters, protects plugs from dust, and keeps the floor looking much cleaner.
Common Podcast Desk Cable Management Mistakes
Most messy podcast desks aren’t caused by having too many cables. They usually happen because cables are added one at a time without a plan. Avoid these mistakes to keep your podcast workspace organized as it grows.
Using Cables That Are Too Long
Long cables create unnecessary loops behind your desk and make cable routing harder to manage.
Choose cable lengths that comfortably reach each device without leaving large amounts of extra cable. Less excess cable means less clutter to hide later.
Running Audio and Power Cables Together
Running XLR cables beside power cords for long distances can increase the chance of electrical interference.
Whenever possible, keep audio and power cables on separate routes. If they must cross, let them cross at a single point instead of running side by side.
Leaving Cables on the Floor
Floor cables quickly collect dust and can get caught under your chair.
Routing cables underneath the desk protects them from damage and makes your workspace easier to clean.
Using Zip Ties for Everything
Zip ties create tidy cable bundles, but they also make upgrades more difficult.
If you replace a cable or add another device, every zip tie has to be cut before you can make changes. Reusable Velcro cable ties are a better choice for podcast setups that continue to grow.
Ignoring Future Upgrades
Most podcast studios change over time.
You might add another microphone, a second monitor, a monitor arm, another camera, extra lighting, or a new audio interface.
Leave some free space inside your cable tray, cable sleeves, and cable channels so you can add equipment without rebuilding your entire cable layout.
Conclusion
You don’t have to organize every cable in one afternoon. Start with the power strip, then route your microphone cable, and finally clean up your USB cables. One small improvement at a time is enough to create a cleaner, more organized podcast workspace that’s easier to use and looks better on camera.
FAQs
How often should I reorganize my podcast desk cables?
You only need to reorganize your cables when you add, remove, or move equipment. A quick check every few months helps keep your recording setup tidy and prevents cable clutter from building up again.
Can cable management improve my podcast recording quality?
Cable management won’t directly improve microphone sound quality, but keeping audio cables away from power cables can help reduce the chance of electrical interference in some setups.
Is a standing desk good for podcast cable management?
Yes. A standing desk can work well if you leave enough slack for moving parts and secure cables with clips or flexible cable sleeves to prevent them from stretching during height adjustments.
Should I replace old cables while organizing my podcast desk?
If a cable has damaged insulation, loose connectors, or frequent connection problems, replacing it during cable management is a good idea. Faulty cables can interrupt recordings and make troubleshooting harder.
What’s the easiest cable management upgrade for beginners?
An under-desk cable tray combined with reusable Velcro cable ties usually delivers the biggest improvement. These two items hide the largest cable bundles and keep future changes simple.
How can I keep my podcast desk organized after adding new equipment?
Before connecting new gear, decide where the cable will run and secure it immediately. Organizing one cable at a time prevents your desk from becoming cluttered again.