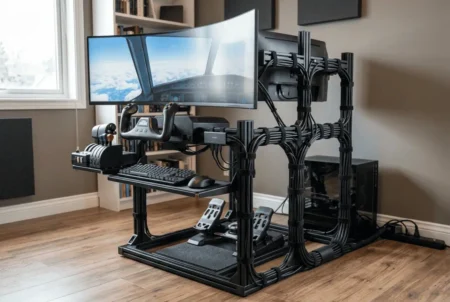



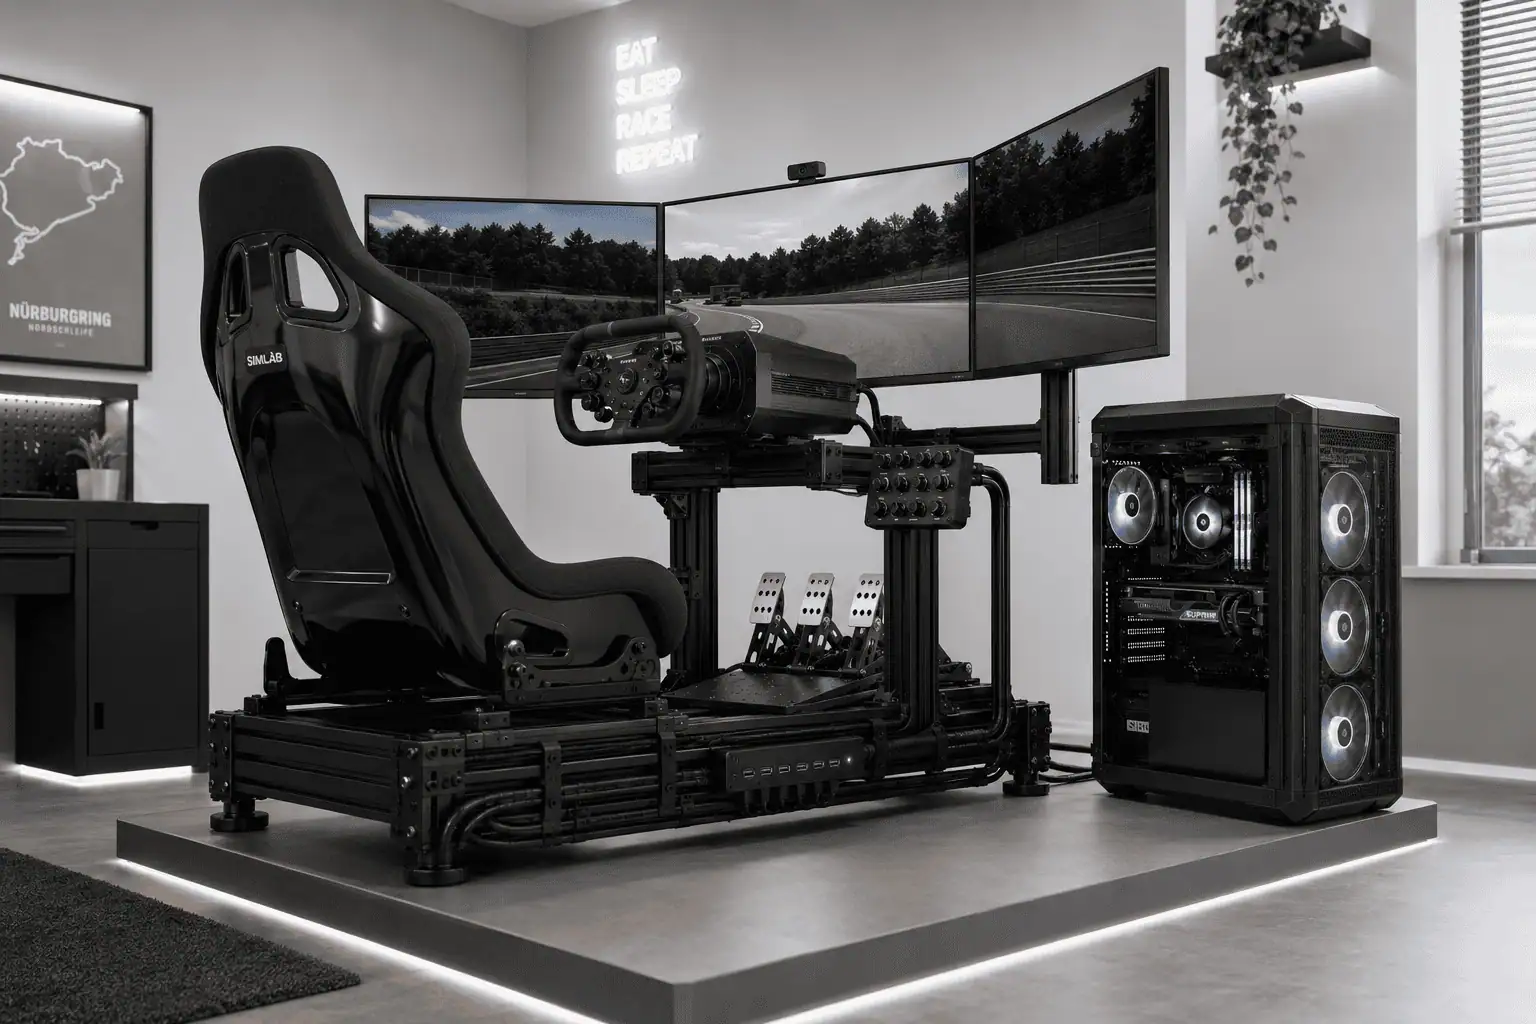
Sim Racing Rig Cable Management can turn a cluttered racing cockpit into a clean, organized setup. Loose USB cables, power bricks, monitor wires, and pedal cables can quickly create a mess around your wheelbase and aluminum profile cockpit. Besides looking untidy, poor cable routing can make troubleshooting harder and future upgrades more frustrating.
The good news is that you don’t need expensive accessories or a complete rebuild. With a few simple cable routing techniques, you can reduce clutter, protect your equipment, and organize your sim racing rig more efficiently. This guide shares 15 practical ideas for a cleaner, upgrade-friendly cockpit.
Why Cable Management Matters for Your Sim Racing Rig
A clean sim racing rig isn’t just about appearance.
Good cable management protects your equipment, keeps your racing cockpit organized, and makes future upgrades much easier.
Whether you use an aluminum profile cockpit or a tube-frame rig, a few simple cable management habits can save time and prevent unnecessary cable damage.
What Is Sim Racing Rig Cable Management?
Sim racing rig cable management is the process of organizing power, USB, display, and accessory cables so they stay protected, easy to maintain, and out of the way while you race.
Good cable management helps you:
- Prevent cables from getting caught under pedals or your seat.
- Reduce strain on USB and power connectors.
- Troubleshoot problems faster.
- Add new accessories without rebuilding your wiring.
- Keep your gaming area tidy.
Spending a little time organizing your cables now can save hours of work later.
15 Sim Racing Rig Cable Management Ideas
The easiest way to organize your sim racing rig is to follow this order: plan, mount, route, secure, then test.
Start by planning your wiring before securing anything. Then organize power, route cables along the frame, and finish by protecting and labeling your cable runs.
1. Plan Your Cable Layout Before You Start
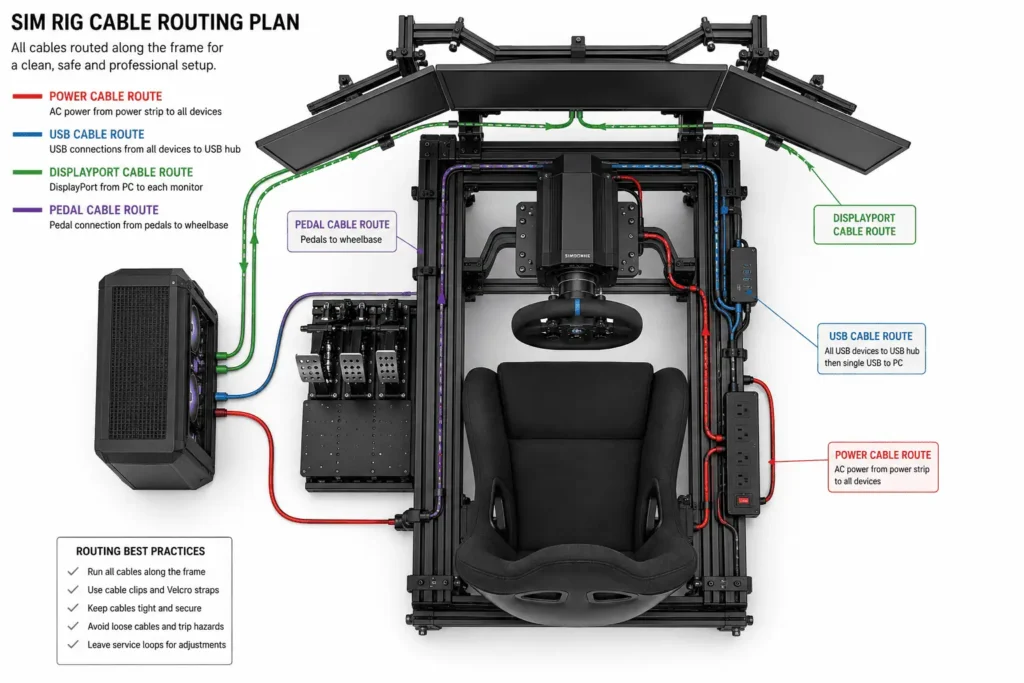
Connect every device first and make sure everything works. It’s much easier to fix a loose cable before you secure it.
Before routing cables, decide:
- Where the power strip will go.
- Where the powered USB hub will be mounted.
- Which side of the frame each cable will follow.
If you already know you’ll be adding a new wheelbase, shifter, motion system, or VR headset soon, wait until those upgrades are installed before doing your final cable management. Planning ahead saves time and prevents you from rerouting cables later.
2. Mount the Power Strip in One Central Location
A single power strip keeps your wiring organized and reduces cables running across the floor.
Good mounting locations:
- Under the seat
- Side frame rail
- Rear cross member
- Behind the monitor stand (if your monitor stand is attached to the rig)
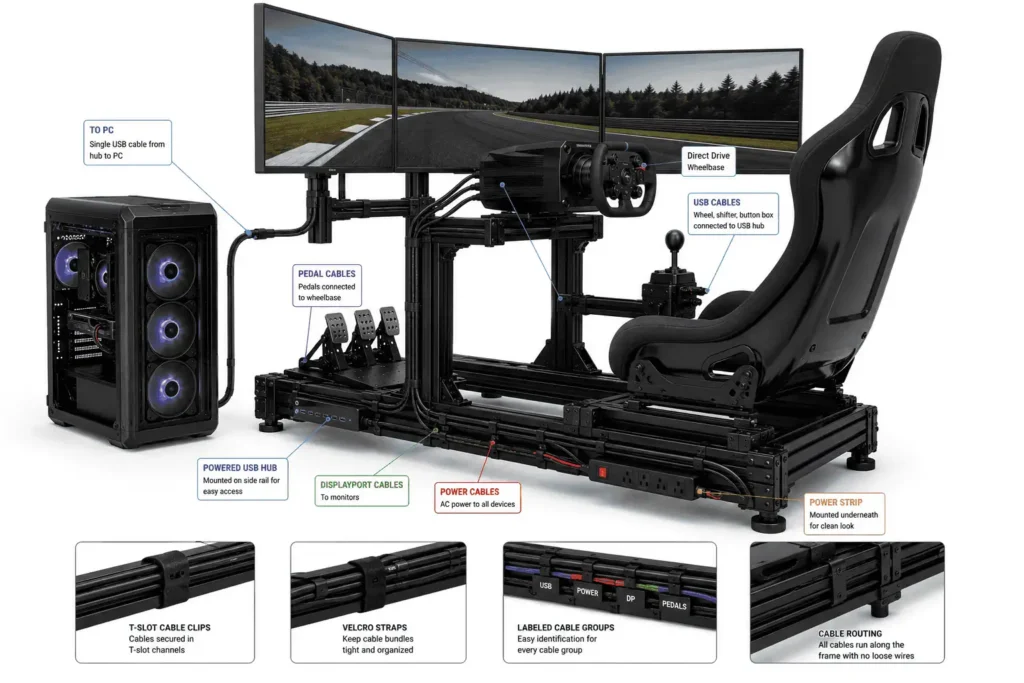
Whenever possible, keep the power strip, powered USB hub, and power adapters close together. Creating one central wiring hub makes cable routing simpler and keeps your racing cockpit easier to maintain.
Keep the power strip within easy reach so you can quickly power your setup on or off.
Tip: Mount the power strip instead of leaving it on the floor. This protects it from dust and accidental kicks.
3. Install a Powered USB Hub on the Rig
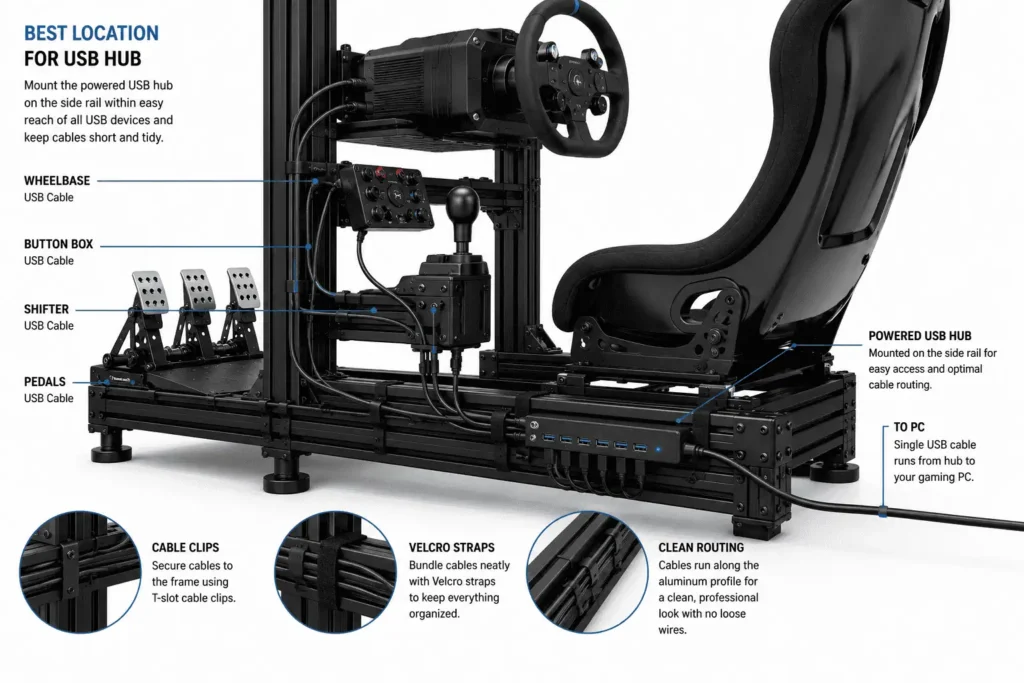
A powered USB hub can dramatically reduce cable clutter.
Instead of running separate USB cables from every device to your PC, connect them to one hub mounted on the sim cockpit.
This works well for:
- Wheelbase
- Pedals
- Shifter
- Handbrake
- Button box
- Dash display
- RGB accessories
Mount the hub close to these devices, such as under the pedal tray or on a side rail.
Benefits:
- Only one USB cable runs to the PC.
- Easier to add new accessories.
- Cleaner cable routing.
- Fewer USB cables running back to your PC.
A good goal is to have only one USB cable and one power cable leaving the cockpit. This creates a cleaner setup and makes moving or cleaning your rig much easier.
Choose a hub with a few spare ports so you don’t need to replace it after your next upgrade.
Pro Tip
Aim to reduce your setup to one power cable and one USB cable leaving the cockpit whenever possible. Mounting your power strip and powered USB hub in one central location creates a cleaner setup, simplifies troubleshooting, and makes it much easier to move or clean your sim racing rig.
4. Group Cables by Device Instead of Cable Type
Instead of bundling all your USB cables together, organize cables by the device they belong to. This makes upgrades and troubleshooting much easier.
For example:
- Wheelbase: USB + power
- Pedals: USB + power
- Shifter: USB
- Handbrake: USB
- Monitors: Power + DisplayPort or HDMI
If you replace one device later, you only need to open that cable bundle instead of undoing your entire cable routing.
5. Route Cables Along the Frame Rails
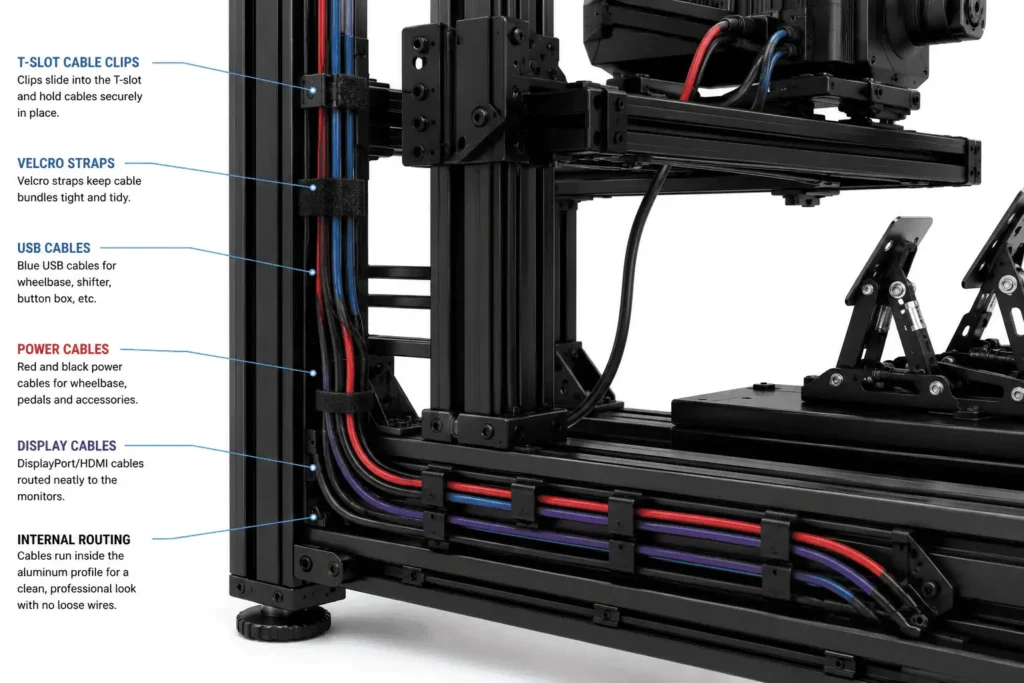
The frame is the best place to hide cables on a sim racing rig. Route cables along the side rails, cross members, or underneath the pedal deck instead of across open spaces.
Avoid routing cables near:
- Moving pedals
- Seat sliders
- Wheel adjustment mechanisms
- Your feet
Secure cables every few inches with cable clips or Velcro straps to keep them close to the frame.
Leave a little slack between cable clips instead of pulling cables tight. This reduces stress on the cable and makes future adjustments easier.
6. Hide Large Power Bricks Together
Wheelbases, monitors, and other accessories often come with bulky power adapters that create unnecessary clutter.
Instead of leaving them on the floor, mount them together in one location.
Common mounting spots:
- Under the seat
- Behind a side panel
- On a dedicated mounting plate
- Inside a cable management box
Leave a small gap between each power brick to improve airflow and prevent heat buildup.
Mounting all power adapters in one place creates a cleaner cockpit, improves airflow around the power bricks, and makes troubleshooting much easier.
7. Use Braided Sleeves or Split Loom Tubing
Once you’ve planned your cable routing, bundle long cable runs with braided sleeves or split loom tubing. They protect cables and give your racing cockpit a cleaner finish.
Braided sleeves are ideal for a neat, premium look.
Split loom tubing is better if you regularly add or remove accessories because it’s easy to open.
Use them for cable bundles that run along the same frame, such as:
- USB cables
- Power cables
- DisplayPort or HDMI cables
Avoid stuffing every cable into one large sleeve. Smaller cable bundles are easier to manage, upgrade, and troubleshoot.
8. Choose Velcro Straps Over Zip Ties
Reusable Velcro straps are the best choice for most sim racing rigs because they make cable management flexible.
Velcro straps help you:
- Upgrade hardware without cutting ties.
- Prevent cables from being over-tightened.
- Speed up maintenance.
- Keep cable bundles neat.
Zip ties still work well for permanent cable runs that are unlikely to change. If you use them, don’t tighten them too much, as this can damage the cable over time.
Velcro may cost a little more, but it’s the better long-term choice for an aluminum profile cockpit or any sim cockpit that you’ll continue upgrading.
9. Separate Power and Data Cables
Try to keep power cables separate from USB, HDMI, DisplayPort, and other data cables whenever possible.
This creates a cleaner cable layout and, in some setups, may help reduce electrical interference—especially if you use speakers or bass shakers.
For the best cable routing:
- Run power and data cables on different frame rails.
- If they need to cross, let them cross at a 90° angle.
- Avoid running them side by side for long distances.
You don’t need perfect separation. Simply avoid bundling every cable together.
10. Leave Service Loops for Adjustable Parts
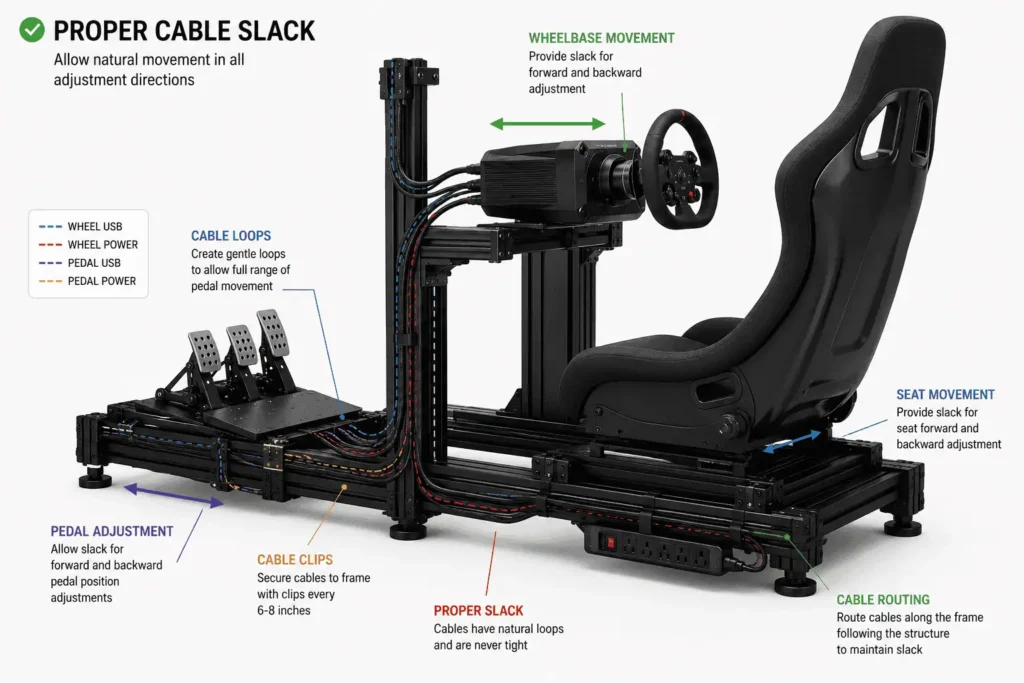
Not every cable should be pulled tight. Leave a small loop of extra cable anywhere your rig moves or adjusts.
Common places include:
- Seat sliders
- Pedal tray
- Wheel deck
- Adjustable monitor mounts
This extra slack reduces tension on connectors and helps prevent cable damage.
Secure the service loop neatly with a Velcro strap so it stays organized without getting in the way.
11. Replace Excessively Long Cables
Factory cables are often much longer than your setup needs.
If you’re building a new sim cockpit, choose cable lengths that match the distance between your devices. Shorter cables reduce clutter and require less bundling than long factory cables.
If possible, replace overly long:
- USB cables
- HDMI cables
- DisplayPort cables
- Power cables
Benefits include:
- Less cable clutter
- Easier cable routing
- Smaller cable bundles
- Better airflow around your rig
Measure the required length before buying replacement cables. A cable that’s slightly longer than needed is always better than one that’s too short.
12. Use T-Slot Cable Clips or Cable Mounts
Once you’ve planned your cable route, secure it with cable clips. They keep cables close to the frame, prevent sagging, and protect them from accidental snags.
Choose the right option for your rig:
- T-slot cable clips for aluminum profile cockpits
- Adhesive cable clips for tube-frame rigs
- Screw-on cable mounts for permanent installations
Place clips every few inches to support the cable without pulling it tight.
13. Label Important Cables
A few cable labels can save a lot of time when upgrading or troubleshooting your racing cockpit.
Label cables for your:
- Wheelbase
- Pedals
- Powered USB hub
- Monitors
- Power adapters
You can use a label maker, cable tags, or masking tape with clear writing. Knowing exactly which cable belongs to each device makes future maintenance much easier.
14. Test Everything Before Final Cable Management
Before installing cable sleeves, cable clips, or Velcro straps, test your entire setup.
Make sure your:
- Wheelbase connects properly.
- Pedals respond correctly.
- Shifter and handbrake work.
- Monitors display correctly.
- Powered USB hub detects every device.
Once everything works, install your cable sleeves, cable clips, and Velcro straps. Testing first saves you from taking everything apart if a cable needs to be moved or replaced.
15. Leave Room for Future Upgrades
Most sim racing rigs continue to evolve over time. Planning for future accessories now will save you from rebuilding your cable management later.
Common upgrades include:
- VR headset
- Button box
- Dash display
- Bass shakers
- Motion system
- Triple monitors
Leave a little extra space in your cable bundles, keep a few spare USB ports available, and avoid filling every cable clip. This makes it easier to add new hardware without rerouting your entire setup.
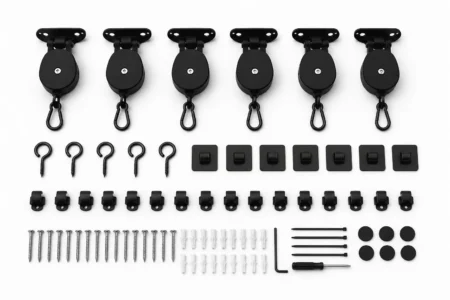
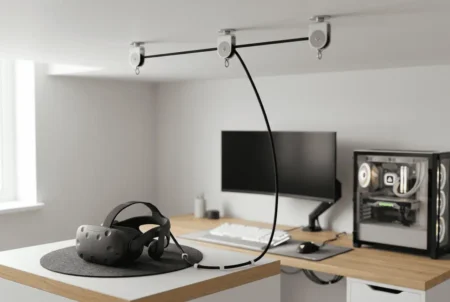
If you use VR for sim racing, a VR cable pulley system can keep the headset cable suspended, reduce cable drag, and make steering movements feel more natural.
Common Sim Racing Rig Cable Management Mistakes to Avoid
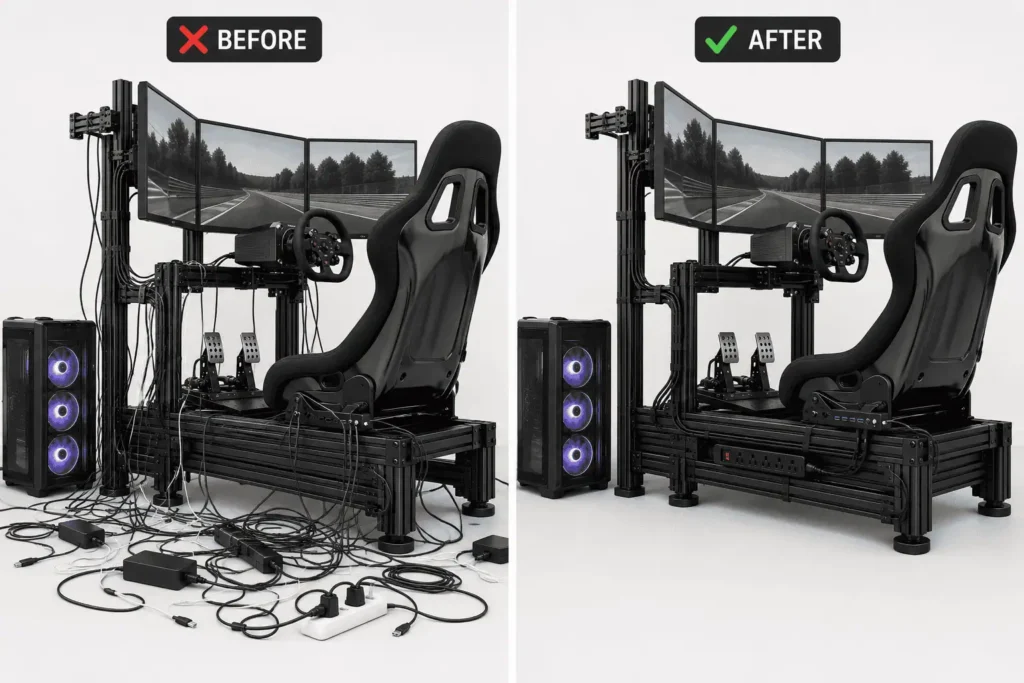
Avoid these common mistakes to keep your sim cockpit clean, organized, and easy to maintain.
Secure Cables Too Early
Always test every device before installing cable clips, sleeves, or zip ties. Fixing a loose connection is much easier while the cables are still accessible.
Use Only Zip Ties
Zip ties are difficult to remove when you upgrade your racing cockpit. Use reusable Velcro straps for most cable runs and reserve zip ties for permanent installations.
Route Cables Across Moving Parts
Keep cables away from:
- Pedals
- Seat rails
- Wheel adjustment points
Moving parts can pinch or wear through cables over time.
Mix Power and Data Cables
Whenever possible, route power cables separately from USB and display cables. This creates a cleaner cable layout and can help reduce interference in some setups.
Ignore Future Upgrades
Leave spare space in your cable bundles and powered USB hub for new accessories. Planning ahead means you won’t need to redo your cable management every time you upgrade.
Essential Sim Racing Cable Management Accessories
You don’t need many accessories to build a clean and organized sim racing rig. Start with these essentials:
- Reusable Velcro straps – Secure cable bundles and make future upgrades easy.
- Braided cable sleeves – Protect cables and create a cleaner finish.
- Split loom tubing – Ideal for cable runs that change frequently.
- T-slot cable clips – Perfect for aluminum profile cockpits.
- Adhesive cable clips – A simple solution for tube-frame rigs.
- Powered USB hub – Reduces the number of USB cables running to your PC.
- Cable labels – Speed up troubleshooting and future upgrades.
- Cable management box – Keeps your power strip and power adapters hidden and organized.
These affordable accessories can make a big difference in keeping your racing cockpit tidy and easier to maintain.
Conclusion
A well-organized sim racing rig is easier to use, maintain, and upgrade. By planning your cable routing, mounting your power strip and USB hub in the right place, securing cables to the frame, and leaving room for future accessories, you can eliminate clutter without spending much money. You don’t have to apply every tip at once—start with the changes that solve your biggest cable problems and improve your setup over time. With a little planning and the right cable management accessories, you can keep your racing cockpit clean, organized, and ready for every racing session.
FAQs
1. Can I use zip ties instead of Velcro straps for a sim racing rig?
Yes, but use zip ties only for permanent cable runs. Reusable Velcro straps are a better choice if you plan to upgrade or rearrange your sim racing rig.
2. How much cable slack should I leave on a sim racing rig?
Leave just enough slack for adjustable parts like the seat, pedals, or wheel deck to move freely without putting tension on the cable.
3. Where should I place a powered USB hub on a sim racing rig?
Mount it close to your wheelbase, pedals, or shifter—such as under the pedal tray or on a side frame rail—to keep USB cable runs short and organized.
4. How often should I reorganize my sim racing rig cables?
You only need to reorganize your cables after adding new hardware or replacing existing components. Otherwise, check them occasionally for loose straps or worn cables.
5. Can poor cable management damage sim racing equipment?
Yes. Tight, stretched, or pinched cables can wear out over time, leading to damaged connectors or intermittent connection issues.
6. Should I hide every cable on my sim racing rig?
No. The goal is to keep cables secure, protected, and easy to access for maintenance—not to make every cable completely invisible.